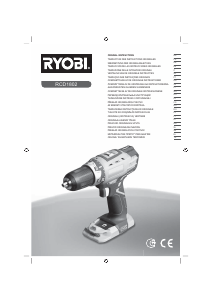
Käyttöohje Ryobi CDC1802 Porakone-ruuvinväännin

Tarvitsetko käyttöoppaan Ryobi CDC1802 Porakone-ruuvinväännin? Alta voit katsoa ja ladata suomenkielisen PDF-oppaan ilmaiseksi. Tällä tuotteella on tällä hetkellä 3 usein kysyttyä kysymystä, 0 kommenttia ja 10 ääniä, joiden keskimääräinen tuotearvio on 70/100. Jos tämä ei ole haluamasi käyttöopas, ota meihin yhteyttä.

Onko tuotteessa vika, eikä käyttöoppaasta ole apua? Siirry Repair Café ‑alueelle etsimään ilmaisia korjauspalveluita.

Käyttöohje

Loading…
3
English
GB
FR DE ES IT NL PT DK SE FI NO RU PL CZ HU RO LV LT EE HR SI SK GR TR
OPERATION
To stop the drill, release the switch trigger and allow the
chuck to come to a complete stop.
NOTE: The drill will not run unless the rotation selector is
pushed fully to the left or right.
Avoid running the drill at low speeds for extended periods
of time. Running at low speeds under constant usage
may cause the drill to become overheated. If this occurs,
cool the drill by running it without a load and at full speed.
KEYLESS CHUCK (See Figure 3.)
The drill has a keyless chuck to tighten or release drill
bits in the chuck jaws. Grasp and hold the collar of the
chuck with one hand. Rotate the chuck body with your
other hand. The arrows on the chuck indicate which
direction to rotate the chuck body in order to LOCK
(tighten) or UNLOCK (release) the drill bit.
WARNING:
Do not hold the chuck body with one hand and
use the power of the drill to tighten the chuck
jaws on the drill bit. The chuck body could slip in
your hand, or your hand could slip and come in
contact with the rotating drill bit. This could cause
an accident resulting in serious personal injury.
TWO-SPEED GEAR SWITCH (See Figure 4.)
The drill has a two-speed gear switch designed for drilling
or driving at LO (1) or HI (2) speeds. A slide switch is
located on top of the drill to select either LO (1) or HI (2)
speed. When using drill in the LO (1) speed range, speed
will decrease and unit will have more power and torque.
When using drill in the HI (2) speed range, speed will
increase and unit will have less power and torque. Use
LO (1) speed for high power and torque applications and
HI (2) speed for fast drilling or driving applications.
ADJUSTABLE TORQUE CLUTCH
This product is equipped with an adjustable torque
clutch for driving different types of screws into different
materials. The proper setting depends on the type of
material and the size of screw you are using.
ADJUSTING TORQUE (See Figure 5.)
There are twenty-four torque indicator settings located on
the front of the drill.
Rotate adjustment ring to the desired setting.
1 - 4 For driving small screws
5 - 8 For driving screws into soft material
9 - 12 For driving screws into soft and hard materials
13 - 16 For driving screws in hard wood
17 - 20 For driving large screws
21 -
For heavy drilling
INSTALLING BITS (See Figure 6-7.)
Lock the switch trigger by placing the rotation selector
in the center position.
Open or close the chuck jaws to a point where the
opening is slightly larger than the bit size you intend to
use. Also, raise the front of the drill slightly to keep the
bit from falling out of the chuck jaws.
Insert the drill bit.
Tighten the chuck jaws on the drill bit. To tighten,
grasp and hold the collar of the chuck with one hand,
while rotating the chuck body with your other hand.
NOTE: Rotate the chuck body in the direction of the
arrow marked LOCK to tighten the chuck jaws.
WARNING:
Make sure to insert the drill bit straight into the
chuck jaws. Do not insert the drill bit into the
chuck jaws at an angle then tighten, as shown
in figure 7. This could cause the drill bit to be
thrown from the drill, resulting in possible serious
personal injury or damage to the chuck.
NOTE: Do not use a wrench to tighten or loosen the
chuck jaws.
REMOVING BITS (See Figure 6.)
Place the rotation selector in center position. This will
lock the switch trigger in the off position.
Loosen the chuck jaws from the drill bit.
To loosen the chuck jaws from the drill bit, grasp
and hold the collar of the chuck with one hand, while
rotating chuck body with your other hand.
NOTE: Rotate chuck body in the direction of the arrow
marked UNLOCK to loosen chuck jaws.
Remove drill bit from chuck jaws.
DRILLING (See Figure 8.)
A level is located on top of the motor housing to help
keep the drill bit level during use.
Check the rotation selector for the correct setting
(forward or reverse).
Secure the material to be drilled in a vise or with
clamps to keep it from turning as the drill bit rotates.
Hold the drill firmly and place the bit at the point to be
drilled.
Depress the switch trigger to start the drill.
Move the drill bit into the workpiece, applying only
enough pressure to keep the bit cutting. Do not force
the drill or apply side pressure to elongate a hole. Let
the tool do the work.
961075042-01.indd Sec1:3961075042-01.indd Sec1:3 7/13/09 6:03:18 PM7/13/09 6:03:18 PM
Lataa käyttöohje suomalainen (PDF, 3.13 MB)
(Mieti ympäristöä ja tulosta tämä käyttöopas vain, jos se on todella tarpeen)

Loading…

Arviointi

Kerro meille mielipiteesi Ryobi CDC1802 Porakone-ruuvinväännin arvioimalla tuote. Haluatko jakaa tuotekokemuksesi tai kysyä kysymyksen? Jätä kommentti sivun alalaidassa.
Oletko tyytyväinen kohteeseen Ryobi CDC1802 Porakone-ruuvinväännin?
Kyllä Ei
70%
30%
10 äänet

Keskustele tuotteesta

Täällä voit jakaa mielipiteesi Ryobi CDC1802 Porakone-ruuvinväännin:sta. Jos sinulla on kysyttävää, lue ensin huolellisesti käyttöohje. Käsikirjaa voi pyytää yhteydenottolomakkeellamme.

Lisää tästä ohjekirjasta

Ymmärrämme, että on mukavaa, että sinulla on paperikäyttöinen käyttöopas laitteellesi Ryobi CDC1802 Porakone-ruuvinväännin. Voit aina ladata oppaan verkkosivuiltamme ja tulostaa sen itse. Jos haluat alkuperäisen käyttöoppaan, suosittelemme ottamaan yhteyttä osoitteeseen Ryobi. He saattavat pystyä toimittamaan alkuperäisen ohjekirjan. Etsitkö laitteen Ryobi CDC1802 Porakone-ruuvinväännin käyttöopasta toisella kielellä? Valitse haluamasi kieli kotisivuiltamme ja etsi mallinumero nähdäksesi, onko sitä saatavilla.

Tekniset tiedot

Tuotemerkki Ryobi
Malli CDC1802
Kategoria Porakone-ruuvinvääntimet
Tiedostotyyppi PDF
Tiedoston koko 3.13 MB

Kaikki käsikirjat kohteelle Ryobi Porakone-ruuvinvääntimet
Lisää Porakone-ruuvinvääntimet käsikirjoja

Usein kysytyt kysymykset kohteesta Ryobi CDC1802 Porakone-ruuvinväännin

Tukitiimimme etsii hyödyllisiä tuotetietoja ja vastaa yleisiin kysymyksiin. Jos huomaat yleisissä kysymyksissä virheen, kerro siitä meille yhteydenottolomakkeella.

Irrotan ruuvin pään käytettäessä porakoneita. Miksi niin? Todennettu

Useimmat porakoneet voidaan asettaa kiertämään kovemmin tai pehmeämmin. Jos päätä irrotetaan jatkuvasti, porakone on todennäköisesti asetettava eri asetukseen. Kun kyseessä on langaton laite, varmista aina, että akku on ladattu parhaan tuloksen saavuttamiseksi.

Tästä oli apual (97) Lue lisää

Pitääkö minun käyttää kuulosuojaimia käytettäessä poraa? Todennettu

Kyllä sinun pitäisi. Vaikka poran tuottama melun määrä voi vaihdella merkkien ja mallien välillä, pitkäaikainen altistuminen kovalle melulle voi aiheuttaa pysyviä kuulovaurioita. Siksi on hyvä käyttää kuulosuojaimia.

Tästä oli apual (37) Lue lisää

Voinko säilyttää sähkötyökaluja vajassa tai autotallissa? Todennettu

Yleensä sähkötyökaluja voi säilyttää vajassa tai autotallissa, vaikka se joskus jäätyy siellä. Sähkötyökalun käyttöiän kannalta on kuitenkin parempi säilyttää se kuivassa paikassa ilman suuria lämpötilanvaihteluita. Aitassa tai autotallissa lämpötilaerot voivat aiheuttaa kondenssiveden muodostumista, joka voi aiheuttaa ruostetta. Lisäksi paristoilla toimivat työkalut kestävät lyhyemmin eivätkä lataudu yhtä hyvin hyvin alhaisissa lämpötiloissa. Lue käyttöopas aina huolellisesti, jotta voit olla varma siitä, miten sähkötyökalusi tulee säilyttää.

Tästä oli apual (29) Lue lisää
Käyttöohje Ryobi CDC1802 Porakone-ruuvinväännin

Liittyvät tuotteet

Aiheeseen liittyvät luokat

×
Download