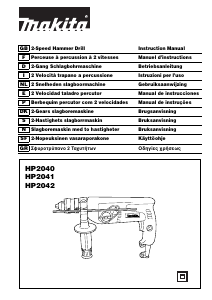
Käyttöohje Makita HP2040 Iskuporakone

Tarvitsetko käyttöoppaan Makita HP2040 Iskuporakone? Alta voit katsoa ja ladata suomenkielisen PDF-oppaan ilmaiseksi. Tällä tuotteella on tällä hetkellä 3 usein kysyttyä kysymystä, 0 kommenttia ja sillä on 1 ääni ja tuotteen keskimääräinen luokitus on 100/100. Jos tämä ei ole haluamasi käyttöopas, ota meihin yhteyttä.

Onko tuotteessa vika, eikä käyttöoppaasta ole apua? Siirry Repair Café ‑alueelle etsimään ilmaisia korjauspalveluita.

Käyttöohje

Loading…

6
For HP2041 (Fig.3)
Hold the ring and turn the sleeve counterclockwise to
open the chuck jaws. Place the bit in the chuck as far as it
will go. Hold the ring firmly and turn the sleeve clockwise
until the chuck is tightened with a little click. After the
click, always tighten the chuck additionally to prevent
accidental loosening during operation.
To remove the bit, hold the ring and turn the sleeve coun-
terclockwise.
Depth gauge (Fig.4)
The depth gauge is convenient for drilling holes of uni-
form depth. Loosen the side grip and insert the depth
gauge into the hole in the side grip. Adjust the depth
gauge to the desired depth and tighten the side grip.
NOTE:
The depth gauge cannot be used at the position where
the depth gauge strikes against the gear housing.
Switch action (Fig.5)
CAUTION:
Before plugging in the tool, always check to see that the
switch trigger actuates properly and returns to the “OFF”
position when released.
For HP2040 and HP2041
To start the tool, simply pull the trigger. Tool speed is
increased by increasing pressure on the trigger. Release
the trigger to stop. For continuous operation, pull the trig-
ger and then push in the lock button. To stop the tool from
the locked position, pull the trigger fully, then release it.
For HP2042
To start the tool, simply pull the trigger. Release the trig-
ger to stop. For continuous operation, pull the trigger and
then push in the lock button. To stop the tool from the
locked position, pull the trigger fully, then release it.
Reversing switch action (Fig.6)
For HP2040 and HP2041
CAUTION:
Always check the direction of rotation before operation.
Use the reversing switch only after the tool comes to a
complete stop. Changing the direction of rotation
before the tool stops may damage the tool.
This tool has a reversing switch to change the direction of
rotation. Move the reversing switch lever to the
d position
for clockwise rotation or the
e position for counterclock-
wise rotation.
Speed change (Fig.7)
Two rpm ranges can be preselected with the speed
change knob.
For low speed, turn the knob so that the pointer on the
knob points to the number 1 marked on the tool body.
(Fig.7-1)
For high speed, turn the knob so that the pointer points to
the number 2. (Fig.7-2)
If the knob is not turned smoothly, turn the chuck slightly
in either direction and then turn the knob again.
Selecting action mode (Fig.8)
This tool has an action mode change button. For rotation
only, depress the button from the side with
f symbol.
For rotation with hammering, depress the button from the
side with
g symbol.
CAUTION:
Always depress the button all the way to your desired
mode position. If you operate the tool with the button
positioned half-way between the mode symbols, the tool
may be damaged.
Operation
1. Hammer drilling operation
When drilling in concrete, granite, tile, etc., depress
the action mode change button from the side with
g symbol to use “rotation with hammering” action.
Be sure to use a tungsten-cabide tipped bit. Do not
apply more pressure when the hole becomes
clogged with chips or particles. Instead, run the tool
at an idle, then remove the bit partially from the hole.
By repeating this several times, the hole will be
cleaned out.
After drilling the hole, use the blow-out bulb to clean
the dust out of the hole. (Fig.9)
2. Drillng operation
When drilling in wood, metal or plastic materials,
depress the action mode change button from the
side with
f symbol to use “rotation only” action.
Drilling in wood
When drilling in wood, best results are obtained
with wood drills equipped with a guide screw. The
guide screw makes drilling easier by pulling the bit
into the workpiece.
Drilling in metal
To prevent the bit from slipping when starting a
hole, make an indentation with a centerpunch and
hammer at the point to be drilled. Place the point
of the bit in the indentation and start drilling.
Use a cutting lubricant when drilling metals. The
exceptions are iron and brass which should be
drilled dry.
CAUTION:
Pressing excessively on the tool will not speed up
the drilling. In fact, this excessive pressure will only
serve to damage the tip of your bit, decrease the
tool performance and shorten the service life of
the tool.
• There is a tremendous twisting force exerted on
the tool/bit at the time of hole breakthrough. Hold
the tool firmly and exert care when the bit begins
to break through the workpiece.
A stuck bit can be removed simply by setting the
reversing switch to reverse rotation in order to back
out. However, the tool may back out abruptly if you
do not hold it firmly.
Always secure small workpieces in a vise or simi-
lar hold-down device.
Lataa käyttöohje suomalainen (PDF, 0.45 MB)
(Mieti ympäristöä ja tulosta tämä käyttöopas vain, jos se on todella tarpeen)

Loading…

Arviointi

Kerro meille mielipiteesi Makita HP2040 Iskuporakone arvioimalla tuote. Haluatko jakaa tuotekokemuksesi tai kysyä kysymyksen? Jätä kommentti sivun alalaidassa.
Oletko tyytyväinen kohteeseen Makita HP2040 Iskuporakone?
Kyllä Ei
100%
0%
1 ääni

Keskustele tuotteesta

Täällä voit jakaa mielipiteesi Makita HP2040 Iskuporakone:sta. Jos sinulla on kysyttävää, lue ensin huolellisesti käyttöohje. Käsikirjaa voi pyytää yhteydenottolomakkeellamme.

Lisää tästä ohjekirjasta

Ymmärrämme, että on mukavaa, että sinulla on paperikäyttöinen käyttöopas laitteellesi Makita HP2040 Iskuporakone. Voit aina ladata oppaan verkkosivuiltamme ja tulostaa sen itse. Jos haluat alkuperäisen käyttöoppaan, suosittelemme ottamaan yhteyttä osoitteeseen Makita. He saattavat pystyä toimittamaan alkuperäisen ohjekirjan. Etsitkö laitteen Makita HP2040 Iskuporakone käyttöopasta toisella kielellä? Valitse haluamasi kieli kotisivuiltamme ja etsi mallinumero nähdäksesi, onko sitä saatavilla.

Tekniset tiedot

Tuotemerkki Makita
Malli HP2040
Kategoria Iskuporakoneet
Tiedostotyyppi PDF
Tiedoston koko 0.45 MB

Kaikki käsikirjat kohteelle Makita Iskuporakoneet
Lisää Iskuporakoneet käsikirjoja

Usein kysytyt kysymykset kohteesta Makita HP2040 Iskuporakone

Tukitiimimme etsii hyödyllisiä tuotetietoja ja vastaa yleisiin kysymyksiin. Jos huomaat yleisissä kysymyksissä virheen, kerro siitä meille yhteydenottolomakkeella.

Miten iskuporakone ja poravasara eroavat toisistaan? Todennettu

Iskuporakoneella voidaan porata reikiä tiili- ja harkkoseiniin. Betoniseiniin poraamiseen tarvitaan poravasara.

Tästä oli apual (109) Lue lisää

Pitääkö minun käyttää kuulosuojaimia käytettäessä poraa? Todennettu

Kyllä sinun pitäisi. Vaikka poran tuottama melun määrä voi vaihdella merkkien ja mallien välillä, pitkäaikainen altistuminen kovalle melulle voi aiheuttaa pysyviä kuulovaurioita. Siksi on hyvä käyttää kuulosuojaimia.

Tästä oli apual (22) Lue lisää

Voinko säilyttää sähkötyökaluja vajassa tai autotallissa? Todennettu

Yleensä sähkötyökaluja voi säilyttää vajassa tai autotallissa, vaikka se joskus jäätyy siellä. Sähkötyökalun käyttöiän kannalta on kuitenkin parempi säilyttää se kuivassa paikassa ilman suuria lämpötilanvaihteluita. Aitassa tai autotallissa lämpötilaerot voivat aiheuttaa kondenssiveden muodostumista, joka voi aiheuttaa ruostetta. Lisäksi paristoilla toimivat työkalut kestävät lyhyemmin eivätkä lataudu yhtä hyvin hyvin alhaisissa lämpötiloissa. Lue käyttöopas aina huolellisesti, jotta voit olla varma siitä, miten sähkötyökalusi tulee säilyttää.

Tästä oli apual (5) Lue lisää
Käyttöohje Makita HP2040 Iskuporakone

Liittyvät tuotteet

Aiheeseen liittyvät luokat