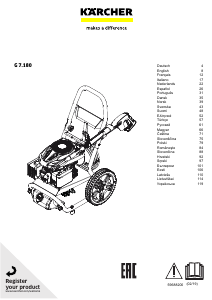
Käyttöohje Kärcher G 7.180 Painepesuri

Tarvitsetko käyttöoppaan Kärcher G 7.180 Painepesuri? Alta voit katsoa ja ladata suomenkielisen PDF-oppaan ilmaiseksi. Tällä tuotteella on tällä hetkellä 3 usein kysyttyä kysymystä, 0 kommenttia ja sillä on 1 ääni ja tuotteen keskimääräinen luokitus on 100/100. Jos tämä ei ole haluamasi käyttöopas, ota meihin yhteyttä.

Onko tuotteessa vika, eikä käyttöoppaasta ole apua? Siirry Repair Café ‑alueelle etsimään ilmaisia korjauspalveluita.

Käyttöohje

Loading…

English 9
Scope of delivery
The scope of delivery for the appliance is shown on the
packaging. Check the contents for completeness when
unpacking. If any accessories are missing or in the
event of any shipping damage, please notify your deal-
er.
Safety devices
CAUTION
Missing or modified safety devices
Safety devices are provided for your own protection.
Never modify or bypass safety devices.
High-pressure gun lock
The lock locks the lever of the high-pressure gun and
prevents the device from starting unintentionally.
Thermostat valve
The thermostat valve protects the pump from overheat-
ing. The water is
heated by the circulation operation.
The thermostat valve opens at a water temperature of
50 °C and releases hot water.
Symbols on the device
Device description
For the illustrations, refer to the graphics page
Illustration A
1 Detergent tank
2 Detergent filling hole
3 Detergent tank fastening screw
4 Quick coupling for high-pressure hose
5 Engine oil filling hole
6 Engine starter motor
7 High-pressure hose storage compartment
8 Plate
9 Transport handle
10 Storage / parking position for high-pressure gun
11 Rotary knob
12 Fuel tank filling hole
13 Power switch "0/OFF" / "I/ON"
14 Type plate
15 Water connection coupling with sieve
16 High-pressure gun
17 High-pressure gun lock
18 Button for separating the high-pressure hose from
the high-pressure gun
19 High-pressure hose
20 Spray lance with dirt grinder for stubborn soiling
21 Vario Power spray lance for common cleaning
tasks. The working pressure can be continuously in-
creased from "SOFT" to "HARD". To adjust the
working pressure, release the trigger gun lever and
turn the spray lance to the desired position. Deter-
gent can be added to the water jet when the spray
lance is turned all the way in the SOFT direction.
22 **Garden hose with commonly available coupling
Fabric reinforced
Diameter of at least 1/2 inch (13 mm)
Length at least 7.5 m
** additionally required
Installation
For the illustrations, refer to the graphics page
Place the screws provided and matching screwdriver at
the ready.
Fit the supplied loose parts onto the device before start-
ing up the device.
Installing the detergent tank
1. Pull the free end of the detergent hose out from un-
der the device.
2. Fit the cap at the free end of the detergent hose onto
the hole in the detergent tank.
Illustration B
3. Push the detergent hose through the cap until it
reaches the bottom of the detergent tank.
4. Attach the detergent tank.
Illustration C
Installing the transport handle with plate
1. Fasten the plate to the upper section of the transport
handle.
Illustration D
2. Connect the upper and lower transport handle sec-
tions.
Illustration E
Starting up
1. Place the device on a flat and level surface.
2. Insert the high-pressure hose into the high-pressure
gun until it audibly latches into place.
Note
Take care to ensure the correct alignment of the nip-
ple.
Illustration F
3. Check for a secure connection by pulling on the
high-pressure hose.
4. Insert the high-pressure hose into the quick coupling
until it audibly latches into place.
Note
Take care to ensure the correct alignment of the nip-
ple.
Illustration G
5. Check for a secure connection by pulling on the
high-pressure hose.
6. Check the oil level and top up with oil if necessary
(see original operating instructions of the engine).
Illustration H
Do not aim the high-pressure jet may at
persons, animals, live electrical equipment
or the device itself.
Protect the device against frost.
The device may not be directly connected
to the public drinking water network
Risk of burns from hot surfaces.
Health risk from poisonous exhaust gases.
Never inhale the exhaust gases.
Lataa käyttöohje suomalainen (PDF, 9.8 MB)
(Mieti ympäristöä ja tulosta tämä käyttöopas vain, jos se on todella tarpeen)

Loading…

Arviointi

Kerro meille mielipiteesi Kärcher G 7.180 Painepesuri arvioimalla tuote. Haluatko jakaa tuotekokemuksesi tai kysyä kysymyksen? Jätä kommentti sivun alalaidassa.
Oletko tyytyväinen kohteeseen Kärcher G 7.180 Painepesuri?
Kyllä Ei
100%
0%
1 ääni

Keskustele tuotteesta

Täällä voit jakaa mielipiteesi Kärcher G 7.180 Painepesuri:sta. Jos sinulla on kysyttävää, lue ensin huolellisesti käyttöohje. Käsikirjaa voi pyytää yhteydenottolomakkeellamme.

Lisää tästä ohjekirjasta

Ymmärrämme, että on mukavaa, että sinulla on paperikäyttöinen käyttöopas laitteellesi Kärcher G 7.180 Painepesuri. Voit aina ladata oppaan verkkosivuiltamme ja tulostaa sen itse. Jos haluat alkuperäisen käyttöoppaan, suosittelemme ottamaan yhteyttä osoitteeseen Karcher. He saattavat pystyä toimittamaan alkuperäisen ohjekirjan. Etsitkö laitteen Kärcher G 7.180 Painepesuri käyttöopasta toisella kielellä? Valitse haluamasi kieli kotisivuiltamme ja etsi mallinumero nähdäksesi, onko sitä saatavilla.

Tekniset tiedot

Tuotemerkki Karcher
Malli G 7.180
Kategoria Painepesurit
Tiedostotyyppi PDF
Tiedoston koko 9.8 MB

Kaikki käsikirjat kohteelle Kärcher Painepesurit
Lisää Painepesurit käsikirjoja

Usein kysytyt kysymykset kohteesta Kärcher G 7.180 Painepesuri

Tukitiimimme etsii hyödyllisiä tuotetietoja ja vastaa yleisiin kysymyksiin. Jos huomaat yleisissä kysymyksissä virheen, kerro siitä meille yhteydenottolomakkeella.

Voiko auton pestä painepesurilla? Todennettu

Kyllä. Pidä painepesuri vähintään 20 senttimetrin päässä autosta ja käytä enintään 110 bar painetta.

Tästä oli apual (825) Lue lisää

Kuinka painepesuria säilytetään talvella? Todennettu

Painepesuri on tuote, jonka osista vesi kulkee. Tyhjennä se aina ennen varastointia jäätymisvaurioiden välttämiseksi. On suositeltavaa pitää painepesuri pakkasettomassa paikassa, jotta jäätymisvaurioita ei tapahdu.

Tästä oli apual (201) Lue lisää

Mitä PSI tarkoittaa? Todennettu

PSI tarkoittaa Pound per Square Inch, mikä osoittaa paineen määrän. Mitä enemmän PSI-painepesuri voi tuottaa, sitä tehokkaampi se voi puhdistaa.

Tästä oli apual (201) Lue lisää
Käyttöohje Kärcher G 7.180 Painepesuri

Liittyvät tuotteet

Aiheeseen liittyvät luokat