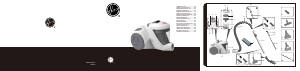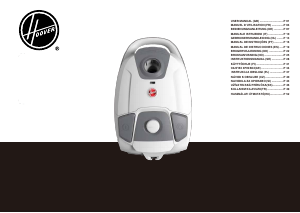
Käyttöohje Hoover PR50PAR 011 Pölynimuri

Tarvitsetko käyttöoppaan Hoover PR50PAR 011 Pölynimuri? Alta voit katsoa ja ladata suomenkielisen PDF-oppaan ilmaiseksi. Tällä tuotteella on tällä hetkellä 9 usein kysyttyä kysymystä, 0 kommenttia ja 0 ääntä. Jos tämä ei ole haluamasi käyttöopas, ota meihin yhteyttä.

Onko tuotteessa vika, eikä käyttöoppaasta ole apua? Siirry Repair Café ‑alueelle etsimään ilmaisia korjauspalveluita.

Käyttöohje

Loading…

3
*Certain Models Only **May vary according to models
The other nozzles are accessories for specialist cleaning tasks and are recommended
for occasional use only.
It is important to note that this vacuum cleaner is supplied with an Energy Label as
required by European Regulation (EU) 665/2013.
If the label shows a red prohibition circle on the left covering the carpet symbol, then this
indicates that the vacuum cleaner is not suitable use on carpets.
If the label shows a red prohibition circle on the right covering the hard oor symbol, then
this indicates that the vacuum cleaner is not suitable for use on hard oors.
#1
NOTE: Dust pick up ability carpet, dust pick up ability hard oor, and energy efciency
in accord with Commission Regulations (EU) 665/2013 and (EU) 666/2013.
The crevice tool*, furniture nozzle* and dusting brush** are stored on the telescopic tube
through a practical accessories’ holder. They can be tted to the handle or the end of
telescopic tube.
On certain models the dusting brush is conveniently integrated in the hose handle.
Crevice Tool* – For corners and hard to reach areas.[X1]
Dusting Brush**– For bookshelves, frames, keyboards and other delicate areas. [X2]
Furniture Nozzle* – For soft furniture and fabrics. [X3]
Parquet Nozzle* – For parquet oors and other delicate oors. [AA]
Pet Hair Remover Mini Turbo Nozzle* - Use the mini turbo nozzle on stairs or for deep
cleaning on textile surfaces and other hard to clean areas. Particularly suitable for pet
hair removal. [Y]
Allergen Remover Mini Turbo Nozzle* – Use the mini turbo nozzle on stairs or for
deep cleaning on textile surfaces and other hard to clean areas. Particularly suitable for
allergen removal. [Z]
IMPORTANT: Do not use mini turbo nozzles on rugs with long fringes, animal hides and
carpet pile deeper than 15mm. Do not keep the nozzle stationary while brush is rotating.
CLEANER MAINTENANCE
Emptying the Dust Container
When the dust reaches the max level indicator on the container, empty the dust container.
IMPORTANT: To maintain optimum performance do not allow the dust to sit higher than
the max level.
1. Release the dust container pressing the bin release latch to detach the dust
container from
the main cleaner and pull upward to remove. [9]
2.
Once the dust container is released from the main cleaner body, hold it by the handle
grip
and put it above a waste container. With the other hand press the bin ap release
button to open the container and release the dust. [10]
3. Once emptied, close the bin ap and ret the dust container onto the cleaner ensuring
the hook has been positioned correctly in the main body. [14] Then lock the container
in place by pushing the container bin handle down until the latch connects with the
main body of the cleaner: you will hear a click when fully connected.
NOTICE: Ensure the power cord has been unplugged before emptying.
NOTIC


The cleaner is tted with pre- motor lter and exhaust lter. To maintain optimum cleaning
performance, regularly remove the lters and tap against the side of the waste container to
release dust. The lters should be washed every 5 dust container empties or when the lter
has excessive dust level.
IMPORTANT: All bagless cleaners require regular lters cleaning. Failure to clean your lter
may result in air blockage, overheating and product failure. This may invalidate your guarantee.
IMPORTANT: Regularly check and maintain the lters.
IMPORTANT: Always ensure the lter pack is fully dry before use.

IMPORTANT: Switch off and unplug the power cord before accessing the lters.
1.
Release the dust container pressing the bin release latch to detach the dust container from
the main cleaner and pull upward to remove.
[9]
2. Release the pre-motor lter cover pressing the pre-motor lter cover latch and rolling
pre-motor lter cover on the opposite edge.
[15]
3. Remove the lter from main cleaner and wash it by hand using warm water. Do not
use hot water or detergents. Remove excess water from the lter and leave to dry fully
before reusing.
[16,19,20]
4. Ret it to the cleaner once fully dry. Press on the top of the lter to ensure it is back
into place.
[16]
5. Lock the pre-motor lter cover pressing at the top: you will hear a click once the pre-
motor lter cover ts into place. [15]
6. Ret the dust container to the cleaner ensuring the hook has been positioned correctly
in the cleaner body. Then lock the container in place pushing the container bin handle
down until the latch connects with the main body of the cleaner: you will hear a click
when fully connected. [14]

1. Unlock the exhaust lter cover pressing two buttons and pulling outward from the
main cleaner. [17]
2. Remove the lter pack pulling the ring-pull of the exhaust lter. [18]
3.
Gently tap and wash the lter pack. Do not use hot water or detergents. Remove excess
water from the lter and leave to dry fully before using. [19,20]
4. Reassemble the lter pack once it is fully dry and ret it onto the cleaner inserting
back into the location.
5.
Lock the exhaust lter cover by pressing the edge with the clips: you will hear a click
once the exhaust lter door ts into place.
[17]
IMPORTANT: Do not use the product without the lter pack tted.
GB
Lataa käyttöohje suomalainen (PDF, 2.3 MB)
(Mieti ympäristöä ja tulosta tämä käyttöopas vain, jos se on todella tarpeen)

Loading…

Arviointi

Kerro meille mielipiteesi Hoover PR50PAR 011 Pölynimuri arvioimalla tuote. Haluatko jakaa tuotekokemuksesi tai kysyä kysymyksen? Jätä kommentti sivun alalaidassa.
Oletko tyytyväinen kohteeseen Hoover PR50PAR 011 Pölynimuri?
Kyllä Ei
Arvostele tuote ensimmäisenä
0 äänet

Keskustele tuotteesta

Täällä voit jakaa mielipiteesi Hoover PR50PAR 011 Pölynimuri:sta. Jos sinulla on kysyttävää, lue ensin huolellisesti käyttöohje. Käsikirjaa voi pyytää yhteydenottolomakkeellamme.

Lisää tästä ohjekirjasta

Ymmärrämme, että on mukavaa, että sinulla on paperikäyttöinen käyttöopas laitteellesi Hoover PR50PAR 011 Pölynimuri. Voit aina ladata oppaan verkkosivuiltamme ja tulostaa sen itse. Jos haluat alkuperäisen käyttöoppaan, suosittelemme ottamaan yhteyttä osoitteeseen Hoover. He saattavat pystyä toimittamaan alkuperäisen ohjekirjan. Etsitkö laitteen Hoover PR50PAR 011 Pölynimuri käyttöopasta toisella kielellä? Valitse haluamasi kieli kotisivuiltamme ja etsi mallinumero nähdäksesi, onko sitä saatavilla.

Tekniset tiedot

Tuotemerkki Hoover
Malli PR50PAR 011
Kategoria Pölynimurit
Tiedostotyyppi PDF
Tiedoston koko 2.3 MB

Kaikki käsikirjat kohteelle Hoover Pölynimurit
Lisää Pölynimurit käsikirjoja

Usein kysytyt kysymykset kohteesta Hoover PR50PAR 011 Pölynimuri

Tukitiimimme etsii hyödyllisiä tuotetietoja ja vastaa yleisiin kysymyksiin. Jos huomaat yleisissä kysymyksissä virheen, kerro siitä meille yhteydenottolomakkeella.

Pölynimurini letku on tukossa, mitä voin tehdä? Todennettu

Irrota letku ja tarkasta, onko letku todella tukossa, katsomalla sen sisään. Jos letku on tukossa, voit ottaa pitkän esineen, kuten harjanvarren, ja työntää sen varovasti letkun läpi. Yleensä esineet, jotka tukkivat letkun, lähtevät tällä tavalla pois. Jos tämä ei auta, ota yhteyttä valmistajaan.

Tästä oli apual (1680) Lue lisää

Minkä kokoisia pölypusseja on? Todennettu

On otettava huomioon kaksi kokoa. Ensimmäinen on levyn koko pussin sisäänkäynnin kanssa. Tämä määrittää, sopiiko pölypussi tiettyyn pölynimuriin. Sitten on pussin koko. Tämä ilmoitetaan enimmäkseen litroina ja määrittää, kuinka paljon pölyä pussiin mahtuu.

Tästä oli apual (1224) Lue lisää

Pölynimurin virtajohto ei palaa takaisin laitteeseen, mitä voin tehdä? Todennettu

On mahdollista, että johdossa on kierre tai taite. Rullaa johto kokonaan ulos muutama kerta ja kelaa se takaisin laitteeseen käsien ohjaamana. Jos tämä ei ratkaise ongelmaa, on mahdollista, että johdon kelausmekanismi on rikki. Ota tällöin yhteyttä valmistajaan tai korjauspalveluun.

Tästä oli apual (876) Lue lisää

Kuinka poistan pölyn ja hiukset pölynimurin harjaspäästä? Todennettu

Pölyn ja hiusten poisto pölynimurin harjaspäästä on tehty manuaalisesti. Jos tämä ei mene toivotulla tavalla, jäljellä olevan lian voi poistaa hienolla kampauksella.

Tästä oli apual (774) Lue lisää

Pölynimurini antaa viheltävän äänen, mitä voin tehdä? Todennettu

Tämä ongelma johtuu usein täydestä pölypussista tai suodattimesta tai kun on aukko, joka päästää ilman letkuun. Tarkista pölypussi ja suodatin ja vaihda ne tarvittaessa. Tarkista, ettei letkussa ole reikiä tai vikoja. Jos tämä ei ratkaise ongelmaa, ota yhteyttä valmistajaan.

Tästä oli apual (738) Lue lisää

Mitä asetuksia pölynimurin harjaspäässä minun pitäisi käyttää? Todennettu

Lähes kaikissa pölynimureissa on pää, jossa on säädettävä harja. Käytä harjaa koville pinnoille naarmujen ja vaurioiden estämiseksi. Sammuta harja matot.

Tästä oli apual (577) Lue lisää

Voinko käyttää paperipölypussia useammin kuin kerran? Todennettu

Tämä ei ole suositeltavaa. Pussin vesihuokoset kyllästyvät aiheuttaen menetyksiä imussa ja mahdollisesti vahingoittamalla moottoria.

Tästä oli apual (379) Lue lisää

Mikä on HEPA? Todennettu

HEPA tarkoittaa korkean hyötysuhteen hiukkasilmaa. Monissa pölynimureissa on HEPA-suodatin. HEPA-suodatin pysäyttää vähintään 85% ja enintään 99,999995% kaikista 0,3 mikrometrin (µm) tai sitä suuremmista hiukkasista.

Tästä oli apual (370) Lue lisää

Voinko käyttää tavallista pölynimuria imemään tuhkaa? Todennettu

Ei, se ei ole ehdottomasti mahdollista. Tuhka, joka näyttää jäähtyneeltä, voi silti olla lämmin tai jopa kuuma sisällä. Tavallista pölynimuria ei ole tarkoitettu tähän ja se voi aiheuttaa tulipalon. Tavallisten pölynimureiden suodattimet eivät myöskään aina sovi pidättämään erittäin pieniä hiukkasia, kuten tuhkaa. Sitten se voi päästä pölynimurin moottoriin ja vahingoittaa.

Tästä oli apual (369) Lue lisää
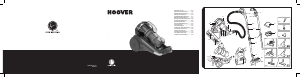
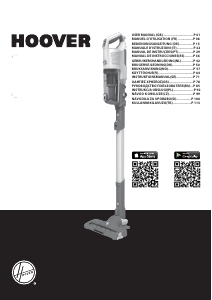
Käyttöohje Hoover PR50PAR 011 Pölynimuri

Liittyvät tuotteet

Aiheeseen liittyvät luokat

×
Download