2 3
ENGLISH (GB)
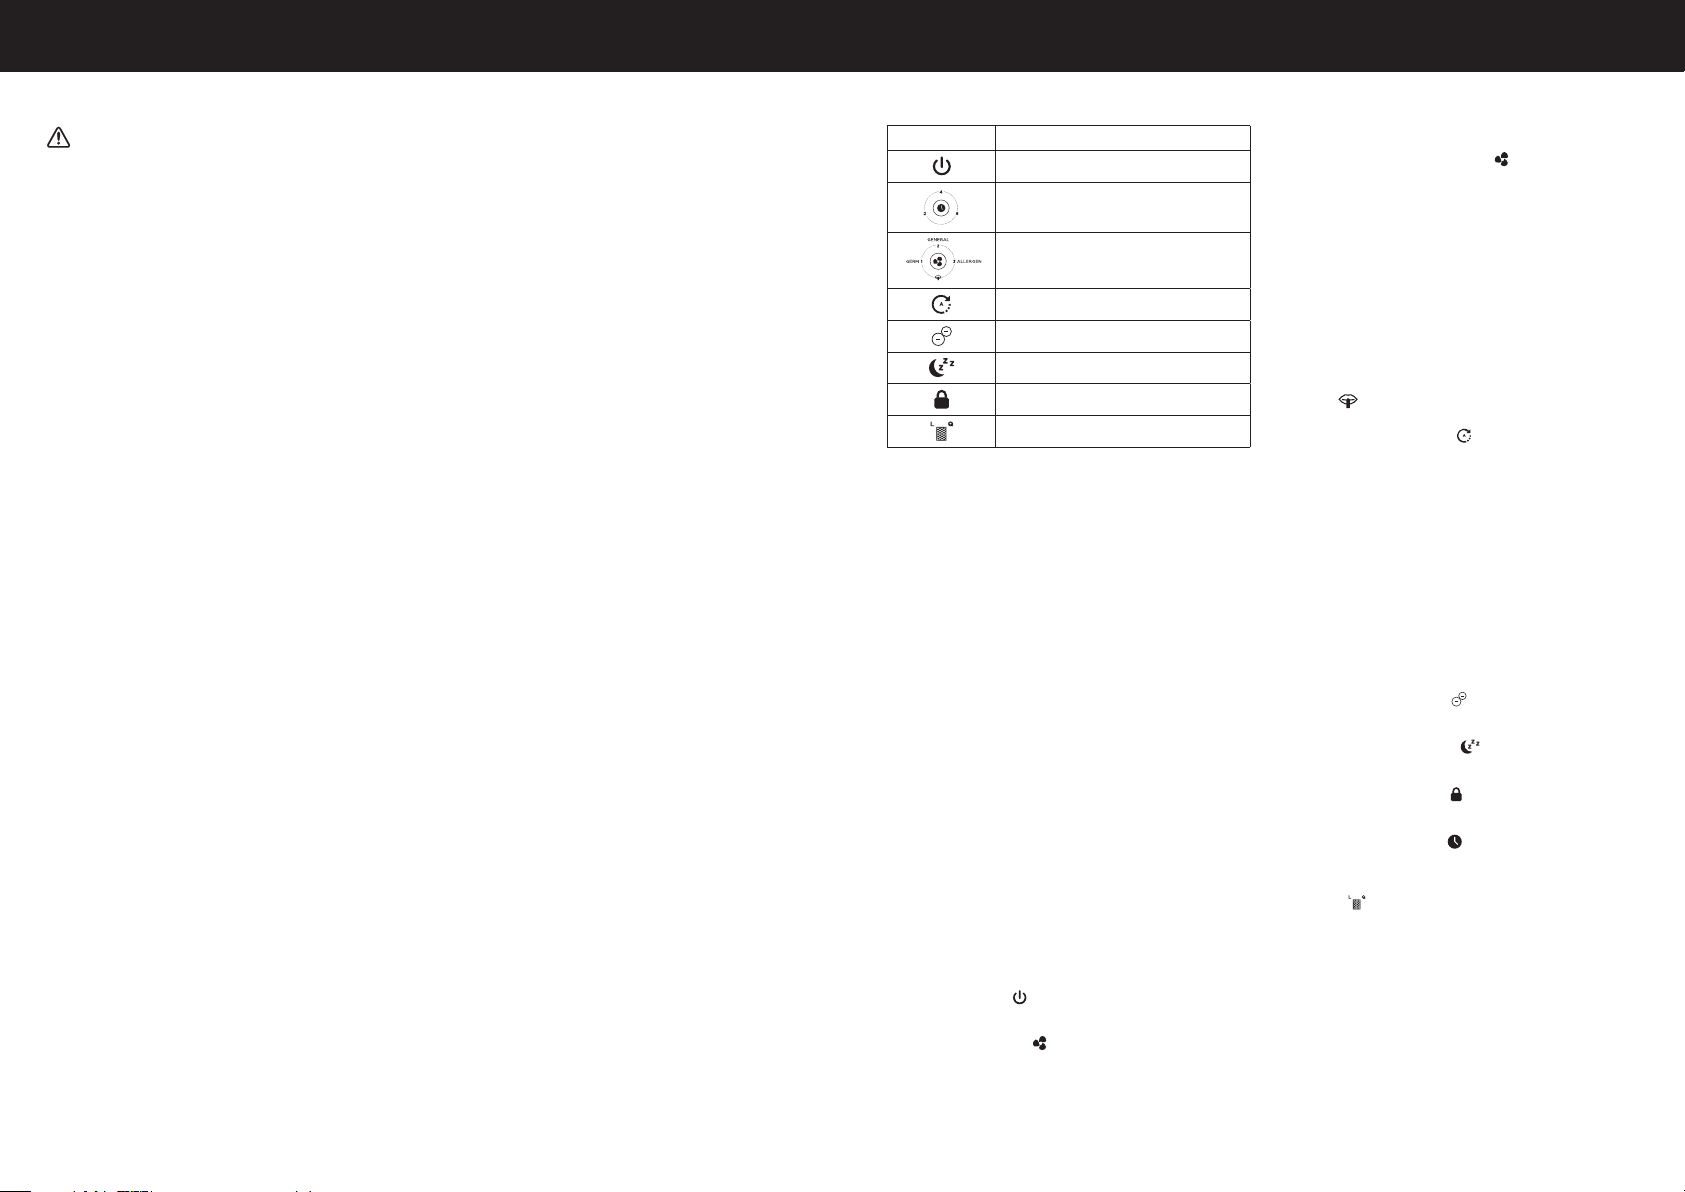
USER INTERFACE
Symbol Function
ON / standby
Auto off timer
Purification level
Auto mode
Ionizer On/Off
Sleep mode
Child lock
Check filter light and reset
SETUP
• Select a firm, level, and flat location. For best airflow, locate the unit 6
inches from any wall or furniture.
• When operating, large volumes of air are drawn toward the air cleaner.
Surrounding areas should be cleaned and/or vacuumed frequently to
prevent build-up of dust and other contaminants. This may also help
prolong the life of the filter. If the unit is placed on a light coloured carpet,
a small mat or rug should be used underneath to prevent staining. This
is especially important in homes with contamination from smoking or
fireplaces.
FIRST TIME USE
(See page 1)
The (Q) TrueHEPA Filter, (L) Granular carbon filter, and mesh pre-filter are
supplied within the air purifier. New air purifiers have their filters wrapped to
ensure purity, and are labeled to help identify the proper replacement filter.
Before using your new air purifier you must remove the wrapper covering the
(Q) TrueHEPA Filter and (L) Granular carbon filter.
Make sure the air purifier is OFF and unplugged. Pull the Front grille toward
you to remove it (see Fig. 1). Remove the Mesh PreFilter using the two pull
tabs near the center (see Fig. 2). Remove the Granular Carbon Filter (see
Fig. 3). Remove the TrueHEPA Filter (see Fig. 4).
Remove protective wrapping from the filters.
Place the (Q) TrueHEPA Filter into the air purifier housing with the arrows
pointing toward the unit (see Fig. 5). Place the (L) Granular Carbon Filter
into the air purifier housing (see Fig. 6). Place the Mesh PreFilter into the
air purifier housing with the two pull tabs facing the front of the unit. Ensure
top, bottom and side tabs are inserted in the slots in the air purifier housing
to secure (see Fig. 7). Replace the grille by lining up the tabs at the bottom
of the grille with the slots in the air purifier housing. Push the top of the
grille towards the unit until it snaps in place (see Fig. 8).
OPERATING INSTRUCTIONS
• Ensure the air cleaner is plugged into a working electrical outlet, an
audible ‘beep’ and the power light will illuminate when plugged.
• Press the power button (
) once. The unit will start at the “general
cleaning” level and remain on this setting until another cleaning level is
chosen.
• Press the Purification Level (
) button to select a different cleaning
level.
PORTABLE AIR PURIFIERS ARE MORE EFFECTIVE IN ROOMS
WHERE ALL DOORS AND WINDOWS ARE CLOSED. IN GENERAL, IT IS
RECOMMENDED THAT YOU RUN YOUR AIR PURIFIER WHILE YOU ARE
AT HOME TO CLEAN THE AIR.
CONTROLS
Purification Level Button – This controls the air cleaning level of the unit.
Your air cleaner will start on the General Cleaning setting each time you
turn the air cleaner on. Continue to press the ( ) button to cycle through
cleaning levels to reach the desired setting.
LEVEL 1 – GERM
This setting cleans the air the fastest and can circulate the air
more frequently. This mode is best for power cleaning the air when
unpleasant odours are noticeable or your room ¡s particularly dusty.
This mode optimises germ capturing performance. Use during cold &
flu season.
LEVEL 2 – GENERAL
This setting is best for General Cleaning. Use this setting to help
reduce airborne dust and smoke particles, like those from cooking or
tobacco smoke.
LEVEL 3 – ALLERGEN
This setting is for reducing many types of airborne allergens. It is best
for fighting airborne allergens during high allergen season. This setting
is great for year-round reduction of pet dander allergens.
SLEEP (
) – This mode is best for ultra-quiet operation, perfect for
nighttime use when sleeping.
AutoMode Button – On auto-mode (
) the air purifier will adjust the
purification level on the detected air quality according to readings from
VOCs (volatile organic compounds) and air particles sensors. The lower
indicator light will illuminate blue, amber, or red depending on the level of
VOCs and/or particles detected in the room by the sensors.
Blue – Good air quality. There is a low level of VOCs or particles
detected; air purifier will operate in the lowest purification level.
Amber – Medium air quality. There is a moderate level of VOCs or
particles detected; air purifier will operate in the middle purification
level,
Red – Bad air quality. There is a high level of VOCs or particles
detected; air purifier will operate in the highest purification level.
NOTE: In AutoMode the unit may take several minutes to measure
the air quality. During this time the indicator will pulse alternate blue,
red, and amber until the air quality determined. The indicator will
than pulse a solid colour when the appropriate automatic setting is
determined.
Ionizer On/Off Button – Ionization (
) provides and extra level of air
cleaning by charging airborne particles. This helps them get captured on
the filter more easily.
Sleep Mode Button – On Sleep mode (
) sets the purification level to
the lowest fan speed and dims the lights. Perfect for nighttime use when
sleeping.
Child Lock Button – The child lock (
) function locks the controls from
being changed. To lock hold the button for 4 seconds. Hold for another 4
seconds to unlock.
Auto-off Timer Button – Push the (
) button if you would like your air
cleaner to run and then automatically shut-off after a certain amount of
time (choose from between 2, 4 and 8 hours).
Check Filters Button – When it is time to check and replace the filters, an
indicator light (
)will illuminate. An “L” or a “Q” will also light up. This will
tell you which filter to change at the time.
When this light comes on, if “Q” is illuminated you should replace the (Q)
TrueHEPA Filter. If “L” is illuminated you should replace
the (L) Granular Carbon Filter. It is recommended that you periodically
check the filters. Depending on operating conditions, the (Q) TrueHEPA
Filter and (L) Granular PreFilter should be replaced every 12 months. You
should clean the mesh pre-filter every 3 months.
AFTER YOU HAVE REPLACED THE HEPA OR CARBON FILTERS, YOU
WILL NEED TO RESET THE ELECTRONIC FILTER CHECK.
TO RESET THE ELECTRONIC FILTER CHECK
After the filters have been replaced and re-installed in the unit, plug the
unit into the power outlet. With the unit in the POWER OFF mode follow the
below steps to reset the filter check timers:
IMPORTANT SAFETY INSTRUCTIONS
Read through all the instructions
before starting to use the appliance.
Keep this manual in a safe place for
future reference.
These instructions are also available
on our website. Please visit
www.hot-europe.com.
WARNING:
• This appliance must only be operated
as instructed in this user manual.
• WARNING: Prior to cleaning or other
user maintenance, the appliance
must be disconnected from the mains
supply.
• This appliance can be used by
children aged from 8 years and above
and persons with reduced physical,
sensory or mental capabilities or
lack of experience and knowledge
if they have been given supervision
or instruction concerning use of
the appliance in a safe way and
understand the hazards involved.
• Children shall not play with the
appliance.
• Cleaning and user maintenance shall
not be made by children without
supervision.
• This appliance requires regular
cleaning. Refer to the CLEANING
instructions provided.
• Do not expose the air purifier to rain, or
use near water, in a bathroom, laundry
area or other damp location.
• The air purifier must be used in an
upright position.
• Do not allow foreign objects to enter
air inlet or outlet grilles as this may
cause electric shock or damage to the
air purifier.
• Unwind the power cord completely.
Failure to do so could cause
overheating and possible fire hazard.
• Do not tug at the power cord to
disconnect the plug. Do not touch the
power cord with wet hands. Do not
remove the power plug from the power
socket while the product is in use.
• Do not use accessories, spare parts
or components supplied by other
manufacturers, and that are not
designed for use with this appliance.
• Always switch the appliance off and
disconnect the power plug from the
power socket when the appliance is
not in use or during transport.
• If the supply cord is damaged, it must
be replaced by the manufacturer, its
service agent or similarly qualified
persons in order to avoid a hazard.
• Do not use this appliance if it is
damaged or shows any signs of
possible damage or if it is not
functioning properly. Disconnect the
power plug from the power socket.
COMPONENTS (See page 1)
1. Front Grille
2. Mesh PreFilter
3. Granular Carbon Filter (L)
4. TrueHEPA Filter (Q)
5. Control Panel
a. AutoOff Timer
b. Power – On/Off
c. Purification Level
d. Auto Mode
e. Ionizer – On/Off
f. Sleep Mode
g. Child Lock
h. Check Filter Light and Reset
6. Power Cord
7. Particle Sensor Door
ENGLISH (GB)


Keskustele tuotteesta
Täällä voit jakaa mielipiteesi Honeywell HPW710WE Ilmanpuhdistin:sta. Jos sinulla on kysyttävää, lue ensin huolellisesti käyttöohje. Käsikirjaa voi pyytää yhteydenottolomakkeellamme.