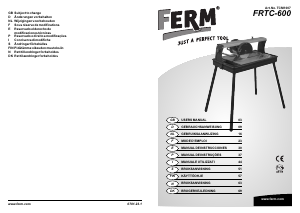
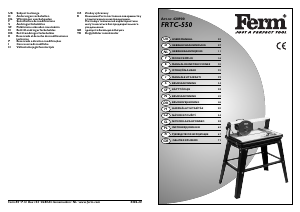
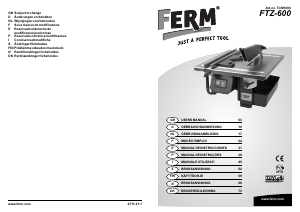
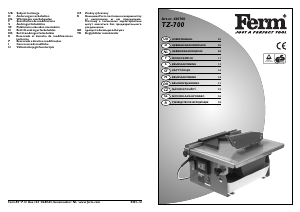
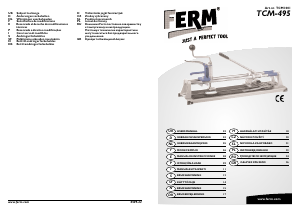
Käyttöohje FERM TCM1001 Laattaleikkuri

Tarvitsetko käyttöoppaan FERM TCM1001 Laattaleikkuri? Alta voit katsoa ja ladata suomenkielisen PDF-oppaan ilmaiseksi. Tällä tuotteella on tällä hetkellä 3 usein kysyttyä kysymystä, 0 kommenttia ja 0 ääntä. Jos tämä ei ole haluamasi käyttöopas, ota meihin yhteyttä.

Onko tuotteessa vika, eikä käyttöoppaasta ole apua? Siirry Repair Café ‑alueelle etsimään ilmaisia korjauspalveluita.

Käyttöohje

Loading…

Caution! For your own safety, carefully read these
instructions for use before using the machine.
TECHNICAL SPECIFICATIONS
6 mm
400 mm
30 -80 mm
0-45
o
TABLE OF CONTENTS:
1. SPECIAL SAFETY INSTRUCTIONS
2. ASSEMBLY
3. HOW TO CUT AND BREAK TILES
4. MAINTENANCE
Faulty and/or discarded electrical or electronic
apparatus have to be collected at the appropriate
recycling locations.
1. SPECIAL SAFETY
INSTRUCTIONS
1. The tile cutting machine is fitted with a replaceable
circular blade. Therefore, keep children away.
2. After use the machine must be stored in a safe and
dry place, away from children.
3. This machine has been designed for cutting and
breaking glazed tiles, and must not be used for any
other purpose.
4. When using the tile cutting machine make sure to
keep extension leads and such away from the
machine.
5. Always place the tile cutting machine on a level and
firm surface.
6. CAUTION! The edges of cut tiles are sharp.
2. ASSEMBLY
Assemble the tile cutting machine as shown in the
drawing.
ASSEMBLY OF THE TILE CUTTING
MACHINE
Remove all the parts from the box and assemble the tile
cutting machine as follows:
1. Slide the black rubber feet (T) over the corners of
the tile cutter. Slide a washer onto the bolt and push
this into the rubber foot. Now slide a washer and a
nut over the bolt on the back and fasten this
properly. Repeat this for the other three corners.
2. Mount the fastening blocks (N) with the 2 tubes (M)
onto the bottom plate (V) using the 4 bolts (O) and
washers (P).
3. Screw the lever (H) onto the tube fastening (I).
4. Finally, mount the sash angle (U) onto the bottom
plate (V) using the knob (S) and washer.
ASSEMBLY OF THE HOLLOW SQUARE
CHISEL
1. Place the hollow square chisel above the hole in the
bottom plate (V).
2. Make sure that the clamping plate (E) comes under
the 2 tubes and fasten this using the socket head
wrench supplied. The socket head wrench is situated
in the black fastening plate (C).
3. It is important that the drill (G) and the knife (F) are
adjusted in such a way that they just touch the
bottom plate (V). This adjustment can be done using
the two nuts at the top of the hollow square chisel.
Then fasten these nuts against each other.
3. HOW TO CUT AND BREAK TILES
1. Use a soft-tipped (carpenter’s) pencil to mark off the
cutting line.
2. Place the tile against the stop, the glazed side facing
upward. The pencil mark must be directly below the
blade.
3. Firmly hold the tile and cut several times (at least 4)
along the mark. After each cut, press the lever more
firmly.
4. Lift the lever when it has reached the front edge of
the tile and moved it backward.
5. Subsequently the break-off unit is lifted. Repeat along
the full width of the tile until the notch is sufficiently
deep.
The cutting movement results from moving the
lever from the back edge of the tile towards its
front, while lightly pressing the lever.
WALL TILES
(single baked)
Lift the lever and position the break-off unit in the middle
of the tile. Press the lever down and the tile will break.
FLOOR TILES
(double-baked):
Sometimes these much harder tiles cannot be cut in two
by means of the break-off unit (K) on the tile cutting
machine.
In these cases after making the notch the tile must be
broken in two by tapping the underside of the tile with a
light hammer along the full length of the notch. This way
the break line will spread through the tile, and cause the
tile to break in two along the line. By means of the wing
nut (Q) the angle of the stop can be adjusted.
MAKING HOLES BY MEANS OF THE (HAND)
DRILL
1. Mount the drill attachment including the drill over
the centre of the hole in the base. It is important that
2 Ferm
Ferm 31
EXPLODED VIEW
SPARE PARTS LIST TCM-495
REF NR DESCRIPTION FERM NR
- SPARE CUTTING WHEEL TCA1001
A ELEVATING ARM 207809
E CLAMPING PLATE 207813
F CUTTER 207803
G CUTTER BRACKET 207802
I PIPE FIXTURE FOR LEVER 207807
K BREAKING HEAD 207805
Q WING NUT WITH WASHER 207819
R ANGLE INDICATOR 207820
WVU
T
S
N
P
O
L
I
H
C
B
A
D
M
E
F
K
G
Z
J
QR
Lataa käyttöohje suomalainen (PDF, 0.6 MB)
(Mieti ympäristöä ja tulosta tämä käyttöopas vain, jos se on todella tarpeen)

Loading…

Arviointi

Kerro meille mielipiteesi FERM TCM1001 Laattaleikkuri arvioimalla tuote. Haluatko jakaa tuotekokemuksesi tai kysyä kysymyksen? Jätä kommentti sivun alalaidassa.
Oletko tyytyväinen kohteeseen FERM TCM1001 Laattaleikkuri?
Kyllä Ei
Arvostele tuote ensimmäisenä
0 äänet

Keskustele tuotteesta

Täällä voit jakaa mielipiteesi FERM TCM1001 Laattaleikkuri:sta. Jos sinulla on kysyttävää, lue ensin huolellisesti käyttöohje. Käsikirjaa voi pyytää yhteydenottolomakkeellamme.

Lisää tästä ohjekirjasta

Ymmärrämme, että on mukavaa, että sinulla on paperikäyttöinen käyttöopas laitteellesi FERM TCM1001 Laattaleikkuri. Voit aina ladata oppaan verkkosivuiltamme ja tulostaa sen itse. Jos haluat alkuperäisen käyttöoppaan, suosittelemme ottamaan yhteyttä osoitteeseen FERM. He saattavat pystyä toimittamaan alkuperäisen ohjekirjan. Etsitkö laitteen FERM TCM1001 Laattaleikkuri käyttöopasta toisella kielellä? Valitse haluamasi kieli kotisivuiltamme ja etsi mallinumero nähdäksesi, onko sitä saatavilla.

Tekniset tiedot

Tuotemerkki FERM
Malli TCM1001
Kategoria Laattaleikkurit
Tiedostotyyppi PDF
Tiedoston koko 0.6 MB

Kaikki käsikirjat kohteelle FERM Laattaleikkurit
Lisää Laattaleikkurit käsikirjoja

Usein kysytyt kysymykset kohteesta FERM TCM1001 Laattaleikkuri

Tukitiimimme etsii hyödyllisiä tuotetietoja ja vastaa yleisiin kysymyksiin. Jos huomaat yleisissä kysymyksissä virheen, kerro siitä meille yhteydenottolomakkeella.

Mitä eroa on keraamisilla laatoilla ja posliinilaatoilla? Todennettu

Molemmat on valmistettu savesta, mutta posliinilaatoilla on suurempi tiheys. Tämä tekee posliinilaatoista vahvemman ja kestävämmän, mutta myös vaikeampaa leikata. Tarvitset erikoistuneita työkaluja ja taitoja saadaksesi saman tuloksen kuin keraamisilla laatoilla.

Tästä oli apual (13) Lue lisää

Onko väliä mikä puoli laattaa leikkaan? Todennettu

Kyllä, riippumatta siitä, mitä laattaa leikkaat, on parasta leikata laatan etupuoli ylöspäin. Tämä varmistaa tasaisimman lopputuloksen ja minimoi hakkeen riskin.

Tästä oli apual (10) Lue lisää

Kuinka voin estää laattojani halkeilemasta leikkaamalla niitä? Todennettu

Voit levittää maalarinteipin laattojen yläosaan ennen leikkaamista, jotta leikkaus vähenisi.

Tästä oli apual (10) Lue lisää
Käyttöohje FERM TCM1001 Laattaleikkuri

Liittyvät tuotteet

Aiheeseen liittyvät luokat