Käyttöohje Electrolux EKM5570 Jalustasekoitin

Tarvitsetko käyttöoppaan Electrolux EKM5570 Jalustasekoitin? Alta voit katsoa ja ladata suomenkielisen PDF-oppaan ilmaiseksi. Tällä tuotteella on tällä hetkellä 1 usein kysytty kysymys, 4 kommenttia ja 3 ääniä, joiden keskimääräinen tuotearvio on 67/100. Jos tämä ei ole haluamasi käyttöopas, ota meihin yhteyttä.

Onko tuotteessa vika, eikä käyttöoppaasta ole apua? Siirry Repair Café ‑alueelle etsimään ilmaisia korjauspalveluita.

Käyttöohje

Loading…

7www.electrolux.com
DE
DK
EE
FA
HR
FR
HU
IT
LT
LV
NO
PL
FI
RO
RS
RU
SE
SI
SK
TR
UA
CZ
AR
GB
BG
11 How to use the PerfectRiseLid™ *:
The PerfectRiseLid™ isolates and helps to build up the humid environment for the dough to rise in proper
condition.
Covering the bowl with the PerfectRiseLid™ keeps the dough from drying out, preventing the formation of a
crust on the surface of the dough, which inhibits the proper rising of the dough which results in a poorer baking
result.
12 How to use the Pulse function*:
If the machine is set to speed 1/P, you can temporarily stop the machine by pressing the “PULSE” button on the
speed selector. Pressing it again will start the machine for 1,5 seconds. If you press continuously the machine will
work as long as you keep the button pressed.
13 Attachment hub: The appliance comes with a built in multipurpose Attachment hub. Read and carefully follow
the instructions that comes with each attachment for correct and safe use.
14 Adjusting the Attachment shaft: The appliance is adjusted at the factory so that the Flat Beater clears the
bottom of the Bowl. If the Flat Beater hits the bottom of the Bowl or is too far away from the sides, you can adjust
it correctly. See 14 for further instructions.
15 Turn the Speed selector to “OFF” and unplug the appliance. Tilt the Motor head back. Use a slotted point Head
screwdriver to adjust the screw. Turn counter clockwise to raise the Attachment shaft, turn clockwise to lower it.
HOW TO USE THE MEAT GRINDER*
16 Insert the grind screw (B) into the grinder housing (A). Place the knife (C) over the square shaft at the end of
the grind screw. Place the grinding plate (D) (medium or coarse) over the knife. Tighten the ring (E) by hand until
the meat grinder is secured.
Note: Do not over tighten the ring.
17 Open the Attachment hub Lid on the Stand mixer. Fit the Power shaft of the attachment in the Attachment hub
socket on the Stand mixer. Rotate the attachment back and forth if necessary. Tighten the Attachment hub knob
until the attachment is fully fastened.
Caution: Before attaching accessories turn o the appliance and unplug it.
18 Place the food tray over the grinder housing. Cut raw meat into small pieces and place it on the food tray. Plug
in the appliance and turn the speed selector to desired speed (recommended speed: 6-8). Feed the meat into the
feed chute by using the pusher.
Caution: Do not put your ngers or other utensils in the feed chute.
Note: Meat should not contain bones, muscles or skin.
HOW TO USE THE SLICER/SHREDDER*
19 How to use the Slicer/Shredder: Choose a Slicer or a Shredder knife (Medium or Course). Insert the shaft (square
end) of the selected Knife into the Slicer/Shredder housing so the shaft ts into square hub socket. Secure the
Knife by pulling the Locking handle downwards.
Caution: The blades and inserts are very sharp!
20 Assemble the Slicer/Shredder in the Attachment hub. Place a container under the attachment. Cut the food
into small pieces. Plug in the appliance and turn the Speed selector to desired speed (recommended speed: 8).
21 Feed the food into the Feed chute by using the Pusher. When nished using your attachment, turn o the
appliance and unplug it. Close the Attachment hub lid and tighten the Attachment hub knob.
CLEANING AND CARE
22 Unplug the appliance. We recommend that the wire whip, meat grinder* and slicer/shredder* is washed by
hand in warm soapy water.
The bowl, Flat beater, Dough hook, SoftEdgeBeater™* and PerfectRiseLid™* are dishwasher-proof.
Clean the motor unit with a damp cloth. Caution: Never immerse the motor unit in water! Let all parts dry
thoroughly.
23 Do not use abrasive cleaners or scouring pads when cleaning the appliance.
Enjoy your new Electrolux product!
Lataa käyttöohje suomalainen (PDF, 6.56 MB)
(Mieti ympäristöä ja tulosta tämä käyttöopas vain, jos se on todella tarpeen)

Loading…

Arviointi

Kerro meille mielipiteesi Electrolux EKM5570 Jalustasekoitin arvioimalla tuote. Haluatko jakaa tuotekokemuksesi tai kysyä kysymyksen? Jätä kommentti sivun alalaidassa.
Oletko tyytyväinen kohteeseen Electrolux EKM5570 Jalustasekoitin?
Kyllä Ei
67%
33%
3 äänet

Keskustele tuotteesta

Täällä voit jakaa mielipiteesi Electrolux EKM5570 Jalustasekoitin:sta. Jos sinulla on kysyttävää, lue ensin huolellisesti käyttöohje. Käsikirjaa voi pyytää yhteydenottolomakkeellamme.

leonardo losso 02-01-2022
valo jatkaa vilkkumista myös sammutettuna, joskus se alkaa, sitten pysähtyy ja vilkkuu

vastaa | Tästä oli apual (15) (Googlen kääntämä)
Fabio 13-06-2022
Hyvää iltaa, Electroluxin planeettasekoittimeni vilkkuu aina ja moottori ei käynnisty, mikä se voi olla? Voiko joku auttaa minua?

vastaa | Tästä oli apual (8) (Googlen kääntämä)
Laura L. 22-12-2019
Valo vilkkuu edelleen sammutuksesta huolimatta, ja jos asetan sen arvoon 1, nopeus ei käynnisty.

vastaa | Tästä oli apual (0) (Googlen kääntämä)
maria 17-04-2020
Mistä löydän Electroluxin hiekkaytimen EKM5570 mallin, en löydä sitä, kiitos

vastaa | Tästä oli apual (0) (Googlen kääntämä)

Lisää tästä ohjekirjasta

Ymmärrämme, että on mukavaa, että sinulla on paperikäyttöinen käyttöopas laitteellesi Electrolux EKM5570 Jalustasekoitin. Voit aina ladata oppaan verkkosivuiltamme ja tulostaa sen itse. Jos haluat alkuperäisen käyttöoppaan, suosittelemme ottamaan yhteyttä osoitteeseen Electrolux. He saattavat pystyä toimittamaan alkuperäisen ohjekirjan. Etsitkö laitteen Electrolux EKM5570 Jalustasekoitin käyttöopasta toisella kielellä? Valitse haluamasi kieli kotisivuiltamme ja etsi mallinumero nähdäksesi, onko sitä saatavilla.

Tekniset tiedot

Tuotemerkki Electrolux
Malli EKM5570
Kategoria Jalustasekoittimet
Tiedostotyyppi PDF
Tiedoston koko 6.56 MB

Kaikki käsikirjat kohteelle Electrolux Jalustasekoittimet
Lisää Jalustasekoittimet käsikirjoja

Usein kysytyt kysymykset kohteesta Electrolux EKM5570 Jalustasekoitin

Tukitiimimme etsii hyödyllisiä tuotetietoja ja vastaa yleisiin kysymyksiin. Jos huomaat yleisissä kysymyksissä virheen, kerro siitä meille yhteydenottolomakkeella.

Haluan tietää, kuinka vanha Electrolux-kodinkoneeni on. Miten toimin? Todennettu

Tuotteen iän voi selvittää sarjanumeron avulla. Se löytyy laitteesta. Sarjanumeron ensimmäinen merkki osoittaa vuoden (esim. 1 = 2001) ja kaksi seuraavaa numeroa valmistusviikon (esim. 35 = kyseisen vuoden viikko 35). Sarjanumero 13500016 kertoo siis, että kone on valmistettu vuoden 2001 viikolla 35.

Tästä oli apual (846) Lue lisää
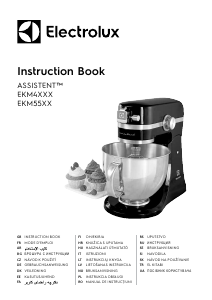
Käyttöohje Electrolux EKM5570 Jalustasekoitin

Liittyvät tuotteet

Aiheeseen liittyvät luokat