4
B Before starting off
This iron is designed for tap water. If you have
extremely hard water, we recommend that you
use a mixture of 50 % tap water and 50 %
distilled water. Fill the water tank to «max»
marking. Never use distilled water exclusively.
Do not add any additives (e.g. starch).
• Before filling with water, turn off the steam
regulator («0» = steam off).
• Holding the iron slightly inclined (as shown in B),
fill the water tank up to the «max» marking.
• Place the iron upright on its heel rest and
connect it to the mains.
Select the temperature according to the ironing
guide on the heel rest of the iron or on the label
in your garments.
The pilot light (7) goes off when the desired
temperature is reached (after approx. 1
1
/
2
min.).
C Ironing
1 Vario steam
You can select the steam quantity using the
steam regulator (3).
(0= no steam, = maximum steam).
Notice: While ironing, do not turn the steam
regulator beyond .
The temperature selector (6) has to be set within
the red range (between «••» and «max»).
Preconditionin
g
(only with model SI 2040)
Steam also develops horizontally at the front
area of the sole plate. This preconditions the
textiles by «pre-steaming», thus making ironing
easier.
Be careful – steam comes out laterally.
2 Power shot
Prior to use, press the Power shot button (5)
3 to 4 times to activate it.
Press the Power shot button in intervals of at
least 5 seconds.
Power shot can be activated when dry ironing.
The temperature selector has to be within the
solid red range (between «•••» and «max»).
Models SI 2030 and SI 2040 on
ly:
The Power shot function can also be used in the
vertical position for steaming hanging clothes.
3 Spray function
Press the spray button (4).
4 Dry ironing
Set the steam regulator (3) on position «0»
(= steam off).
D After ironing
Unplug the iron and turn the steam regulator to
position «0». To prolong the life of the iron,
empty the water tank. Store the cool iron in a dry
place always standing on its heel rest.
E Maintenance and cleaning
To prevent damaging the sole plate, do not iron
over metal buttons or zippers. Clean the sole
plate regularly with a damp cloth. To remove
mineral/starch residues, use a vinegar/water
mixture in the ratio of 1
:
2. Never use steel wool,
abrasive scouring pads, powders or other
chemicals to clean the sole plate.
F Cleaning the anticalc valve
The anticalc valve located on the lower end of
the steam regulator (3) has to be decalcified
regularly (e.g. whenever steam development is
insufficient). For this, the water tank has to be
empty.
Removin
g the steam regulator with the anticalc
valve:
Turn the steam regulator clockwise towards .
Keep on turning firmly beyond the resistance
until the steam regulator is lifted. When
positioned at «•» (anticalc system), pull it out
vertically. Do not touch the anticalc valve at its
lower end. Immerse the anticalc valve in vinegar
(not vinegar essence) or lemon juice for a
minimum of 30 minutes. Brush off remaining
residues and rinse under running water
(fig. F 1–5).
Re-insertin
g the steam regulator:
When re-inserting the steam regulator, make
sure the steam regulator base still points on
setting «•» (anticalc system) (fig. F 6). When
firmly pushing down the steam regulator, it turns
back to (fig. F 7) where it catches.
Notice: The iron must never be used without
steam regulator.
G Decalcifying / anticalc system
In order to clean the steam chamber from
residues, decalcify it as shown in picture section
G 1–11.
Caution: Hot water and steam will come out
from the sole plate when the steam regulator is
turned clockwise beyond .
Wait for the sole plate to cool down, then clean
it as described above.
Then refill the tank with water, heat up the iron
and press the Power shot button four times to
rinse the iron before ironing (fig. G 12–14).
Do not use commercial decalcifiers, they may
damage the iron.
Trouble-shooting guide
Subject to change without notice.
This product conforms to the European
Directives EMC 89/336/EEC and Low
Voltage 73/23/EEC.
Please do not dispose of the product in the
household waste at the end of its useful life.
Disposal can take place at a Braun Service
Centre or at appropriate collection points
provided in your country.
Guarantee
We grant 2 years guarantee on the product
commencing on the date of purchase. Within the
guarantee period we will eliminate, free of charge,
any defects in the appliance resulting from faults in
materials or workmanship, either by repairing or
replacing the complete appliance as we may
choose.
This guarantee extends to every country where this
appliance is supplied by Braun or its appointed
distributor.
This guarantee does not cover: damage due to
improper use, normal wear or use as well as defects
that have a negligible effect on the value or opera-
tion of the appliance. The guarantee becomes void
if repairs are undertaken by unauthorised persons
and if original Braun parts are not used.
To obtain service within the guarantee period, hand
in or send the complete appliance with your sales
receipt to an authorised Braun Customer Service
Centre.
For UK only:
This guarantee in no way affects your rights under
statutory law.
Français
Nos produits sont conçus pour satisfaire les plus
grandes exigences de qualité, de fonctionnalité et
de design. Nous espérons que votre nouveau fer
à repasser Braun vous apportera la plus grande
satisfaction.
Précautions importantes
• Lisez soigneusement toutes les instructions
avant d’utiliser le fer. Conservez ce manuel
d’utilisation pendant toute la durée de vie de
votre appareil.
• Prenez soin de vérifier que la tension de votre
installation électrique corresponde bien à celle
qui est inscrite sur le fer.
• Débranchez toujours le fer de l’alimentation
secteur avant de remplir le réservoir d’eau. Tirez
toujours sur la prise et non sur le cordon
d’alimentation.
• Le cordon d’alimentation ne doit jamais entrer
en contact avec des objets chauds ou avec la
semelle du fer.
• N’immergez jamais le fer dans l’eau ou dans
d’autres liquides.
• Le fer doit être utilisé et rangé sur une surface
stable.
• Pendant les pauses de repassage, placez
toujours le fer sur son talon en s’assurant qu’il
soit sur une surface stable.
• Le fer ne doit pas être laissé sans surveillance
quand il est branché.
• Maintenez l'appareil hors de portée des enfants,
en particulier lorsque vous utilisez la fonction
Power shot.
• Les fers électriques dégagent de fortes
températures et des jets de vapeur très chauds
qui peuvent occasionner des brûlures.
• Ne repassez ou ne défroissez jamais des
vêtements avec votre fer lorsque que vous les
portez.
• Le fer ne doit pas être utilisé s’il a fait une chute,
en cas de signes évidents de dommages, ou s'il
fuit. Examinez le cordon régulièrement pour
déceler les dommages possibles.
• Si l’appareil (y compris le cordon) présente un
défaut, cessez de l’utiliser et déposez-le dans
un centre agréé Braun. Une réparation mal
réalisée ou réalisée par une personne non
qualifiée peut provoquer des accidents et
blesser l’utilisateur.
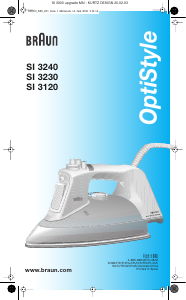
A Description
1 Jet du spray
2 Ouverture du réservoir d’eau
3 Régulateur de vapeur
4 Bouton Spray
5 Bouton de la fonction Power shot
6 Sélecteur de température
7 Témoin lumineux
8 Talon repose-fer
B Avant utilisation
Ce fer est conçu pour fonctionner avec de l’eau
du robinet. Cependant, si votre eau contient
beaucoup de calcaire, nous vous recom-
mandons d’utiliser un mélange de 50 % d’eau
du robinet et de 50 % d’eau distillée.
Remplissez le réservoir jusqu’au niveau « max ».
N’utilisez jamais d’eau distillée seule. Ne pas
ajouter d’autres produits chimiques (comme
l’amidon par exemple).
• Avant de remplir le réservoir d’eau, éteignez le
régulateur de vapeur (« 0 » = pas de vapeur).
• Remplissez le réservoir d'eau jusqu'à
l'inscription « max » en inclinant le fer (comme
indiqué en B).
• Placez le fer à repasser à la verticale sur son
talon et branchez-le.
Sélectionnez la température en fonction des
indications données par le guide de repassage
qui se trouve sur le talon du fer, ou en fonction
des indications qui se trouvent sur vos
vêtements.
Le témoin lumineux du niveau de température
(7) s’éteint lorsque la température désirée est
atteinte (après environ 1 1/2 minute).
C Repassage
1 Fonction vapeur
Vous pouvez sélectionner la quantité de vapeur
via le régulateur de vapeur (3)
(0 = pas de vapeur = vapeur maximale)
Pour information : lors du repassage, ne tournez
pas le régulateur de vapeur au delà de .
Le sélecteur de température (6) doit être placé
dans la zone rouge (entre « •• » et « max »).
Pré-repassage
(seulement pour le modèle SI 2040)
La vapeur se dégage également horizontale-
ment à l’avant de la semelle du fer. Ceci pré-
pare les textiles en les « pré-vaporisant », et,
de ce fait, facilite le repassage. Attention –
la vapeur sort latéralement, sur les côtés
avant.
2 Fonction Power shot
Avant utilisation, appuyez sur le bouton Power
shot (5) 3 à 4 fois pour l'activer.
Appuyez sur le bouton Power shot avec des
intervalles d’au moins 5 secondes.
Power shot peut être activé lors du repassage
à sec.
Le sélecteur de température doit être dans la
zone rouge pleine. (entre « ••• » et « max »).
Seulement
pour les modèles SI 2030 et SI 2040 :
La fonction Power shot peut aussi être utilisée
en position verticale pour repasser les
vêtements suspendus.
Problem Remedy
Drops coming out of
the steam vents
Turn the steam regulator
anti-clockwise to reduce
the steam or turn it off.
Take longer intervals when
pressing the Power shot
button.
Select a higher tempera-
ture setting.
Less steam develops
or no steam at all
Check water level. Clean
the anticalc valve.
Calcium particles
coming through
the steam vents
Decalcify the steam
chamber.
3670352_SI2000_MN Seite 4 Dienstag, 13. März 2007 3:09 15


Keskustele tuotteesta
Täällä voit jakaa mielipiteesi Braun SI 2020 EasyStyle Silitysrauta:sta. Jos sinulla on kysyttävää, lue ensin huolellisesti käyttöohje. Käsikirjaa voi pyytää yhteydenottolomakkeellamme.