
FRANÇAIS ITALIANODEUTSCH PORTUGUÈSENGLISH ESPAÑOLNEDERLANDS DANSK
TONDEUSE NEZ/OREILLES/SOURCILS
Veuillez lire attentivement les consignes de sécurité avant
toute utilisation de l’appareil.
Cette tondeuse BaByliss permet d’enlever rapidement et
en toute sécurité les poils indésirables ou disgracieux des
sourcils, du nez et des oreilles.
CARACTERISTIQUES
•
Tête de coupe circulaire amovible spéciale nez - oreilles.
•
Tête de coupe de précision amovible spéciale sourcils.
•
Guide de coupe pour tailler les sourcils sur 2 hauteurs: 3 et
5 mm.
MISE EN MARCHE DE L’APPAREIL
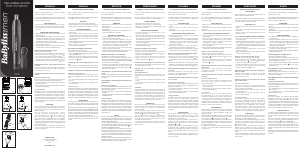
1. Pour introduire une pile, dévisser la partie inférieure de
l’appareil (Fig. 1).
2. Insérer une pile alcaline AA, borne positive vers le bas. (Si
l’appareil reste inutilisé pour de longues périodes ou si la
pile est en n de vie, la retirer de l’appareil. Cela contribuera
à accroître sa durée de vie.)
3. Après avoir inséré la pile, alignez la èche avec l’encoche
située sur le couvercle de la pile et tournez vers la droite
pour aligner avec le cercle (g. 2).
4. Allumez l’appareil en faisant pivoter le couvercle de la pile
vers la droite. L’appareil se mettra en marche une fois que
la marque « I » et l’encoche située sur le couvercle de la pile
seront alignées (g. 2).
5. Après avoir utilisé l’appareil, éteignez-le en alignant
l’encoche du couvercle de la pile avec le cercle (g. 2).
Fixer et retirer les têtes de coupe
Vérier que l’appareil est éteint.
- Retirer la tête de coupe de l’appareil en la faisant pivoter
an de faire coïncider le repère ( I ) avec le repère
IMPORTANT SAFETY
INSTRUCTIONS
READ ALL INSTRUCTIONS
BEFORE USING
FOR HOUSEHOLD
USE ONLY
KEEP AWAY FROM WATER
WARNING
1. Use close supervision when the appliance is
used by, on, or near children or individuals with
certain disabilities.
2. Use appliance only for its intended use as
described in this manual. Use only attachments
recommended by the manufacturer.
3. Never operate the appliance if it is not work-
ing properly, or has been dropped or damaged.
If appliance has fallen into water, do not
reach for it. Drain the water, let the unit dry, be
sure unit is off and then replace the battery.
4. Do not use the appliance with teeth missing
from the blades, as injury may result. Before
each use, make certain the blades are aligned
properly and oiled.
SAVE THESE
INSTRUCTIONS
TROUBLESHOOTING
There are several things to look for if your
trimmer fails to operate:
1. Be sure the trimmer is turned on.
2. Make sure that the battery is properly placed
in the battery compartment. Test the battery to
be sure it is working.
3. Check the blades to see if they are clogged
with hair clippings; if so, use a cleaning brush
to remove hair.
OPERATING
INSTRUCTIONS
1. To insert battery, remove compartment cover
by turning bottom piece of trimmer to the left,
then pulling straight down (Fig. 1).
2. Insert a AA battery, positive terminal
downward. (If you are not going to use the
device for long periods of time or if the battery
is dead, remove the battery from the device.
This will increase the battery's life.)
3. After inserting the battery, align the arrow
with the notch on battery cover and turn to the
right to align with the circle (Fig. 2).
*Do not use in the shower. To clean, simply
rinse trimmer blade under faucet.
4. Always purchase the correct size and grade
of battery most suitable for the intended use.
5. Clean the battery contacts and also those of
the device prior to battery installation.
6. Ensure the battery is installed correctly with
regard to polarity (+ and -).
7. Store unused batteries in their original
packaging, away from metal objects that could
short-circuit them. Never short-circuit batteries.
8. Never dispose of battery in fire, except under
conditions of controlled incineration. Failure
to observe this precaution may result in an
explosion. Never attempt to recharge primary
battery, as this may cause leakage, fire,
or explosion.
9. This appliance is not a toy. Keep away
from children.
GETTING STARTED
NOSE/EAR HAIR TRIMMER
Using the special circular cutting head for nose
and ears, gently insert the cutting head into the
nostril or ear and move it slightly back and forth
to cut the hair.
NOTE: To trim nose hair, insert trimmer at entry
of nostrils and start trimming the lower hairs
until no longer visible.
To trim ear hair, guide the trimmer around the
outer surface of the ear.
TO SWITCH TRIMMER HEADS
Check that the device is turned off.
• Remove the trimming head of the device by
turning it to line-up mark (
) with mark ( ).
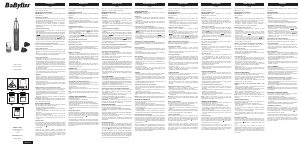
Next, pull the head of the device upward (Fig. 3).
• Gently place the desired cutting head on the
device, then lock by turning the cutting head so
that the two marks line up (
and ) (Fig. 4).
DETAIL TRIMMER AND ATTACHMENTS
Use detail trimmer for sideburns, beard and
mustache, eyebrows, and all detail trimming:
Mustache
Attach detail trimmer and hold trimmer in an
upright position. Bring the tip of the blade
straight into the mustache to trim.
Neckline & Sideburns Attach detail trimmer
and hold the trimmer blade against the skin
at the length desired and move the trimmer
downward.
Comb Attachments
Attach comb to detail trimmer
(Fig. 5) and hold trimmer in
an upright position. Bring
the tip of the blade straight
into the mustache to trim.
2 combs (3 mm, 5 mm) are
included for a variety of
cutting lengths.
TAKING CARE OF YOUR TRIMMER
BLADE CARE
1. Brush away any loose hair that collects in
the blades.
2. Store trimmer in a safe location.
CLEANING TRIMMER
1. Make sure trimmer is OFF. To remove the
trimmer head for cleaning, turn the head
counterclockwise until the “I” mark aligns with
the arrow mark, then lift the head gently.
2. Rinse the head only under water. For proper
functioning of the unit, the handle cannot touch
or be immersed in water (Fig. 6).
3. After cleaning, make sure to shake the head
dry before reattaching it to the body.
4. To reattach the head onto the body, align the
“I” mark on the head with the arrow mark on
the body and then turn clockwise until the “I”
aligns with the circle mark on the body.
Fig.6
Fig. 3
Fig. 1 Fig. 2
Fig. 4
Fig. 5
bsnt1_19pl062448_ib_final 7-9-19.indd 1 7/9/2019 9:50 AM
. Tirer
ensuite la tête de l’appareil vers le haut (Fig. 3)
- Placer délicatement la tête de coupe souhaitée sur l’appareil,
puis verrouiller en faisant pivoter la tête de coupe an de
faire coïncider les deux repères ( I & 0 ) (Fig. 4).
Utilisation de la tête de coupe circulaire spéciale nez et
oreilles
Introduire délicatement la tête de coupe circulaire dans
la narine ou le pavillon de l’oreille et eectuer de légers
mouvements de va-et-vient.
Utilisation de la tête de coupe de précision spéciale
sourcils
Placement du guide de coupe
Pour placer le guide de coupe sur la tête de précision spéciale
sourcils, s’assurer au préalable que l’appareil est éteint.
- Pour obtenir une hauteur de coupe de 3 mm, xez le guide de
coupe sur la tête de coupe.
- Pour obtenir une hauteur de coupe de 5 mm, xez le guide de
coupe sur la tête de coupe.
Accessoires de coupe
Fixez le guide de coupe sur la tondeuse de précision (g. 5) et
tenez la tondeuse à la verticale. Utilisez l’extrémité de la lame pour
tailler les sourcils.
Deux guides de coupe (3 et 5 mm) sont inclus et assurent
diérentes hauteurs de coupe.
Conseils d’utilisation
Pour aner la masse des sourcils, travailler en partant du bord
interne du sourcil et eler par mouvements réguliers vers
l’extérieur. Utiliser la hauteur de coupe de 5 mm pour commencer
et pour se familiariser avec l’appareil. Couper / raser toujours
dans le sens de pousse des poils sans appuyer sur la lame, ce qui
pourrait l’endommager ou occasionner une blessure. Tendre la
peau de la main libre pour permettre un rasage au plus près.
ENTRETIEN
1. Assurez-vous que la tondeuse est éteinte. Pour retirer la
tête de coupe en vue de son nettoyage, tournez-la dans le
sens inverse des aiguilles d’une montre de sorte à aligner la
marque « I » avec la èche. Ensuite, soulevez délicatement
la tête.
2. Rincez la tête de coupe à l’eau uniquement. Pour préserver
le bon fonctionnement de l’appareil, évitez de mouiller ou
d’immerger la poignée (g. 6).
3. Une fois le nettoyage terminé, secouez bien la tête de
coupe pour la sécher complètement avant de la rexer sur
l’appareil.
4. Pour rexer la tête de coupe sur la tondeuse, alignez la
marque « I » située sur la tête de coupe avec la èche située
sur le corps de l’appareil, puis tournez la tête dans le sens
des aiguilles d’une montre de sorte à aligner la marque « I »
avec le cercle situé sur le corps de l’appareil.
SFOLTITRICE NASO/ORECCHIE/SOPRACCIGLIA
Prima di utilizzare l’apparecchio, leggere attentamente le
indicazioni in materia di sicurezza.
La sfoltitrice Babyliss consente di eliminare rapidamente
e in tutta sicurezza i peli indesiderati o superflui da
sopracciglia, naso e orecchie.
CARATTERISTICHE
• Testina di taglio circolare estraibile speciale naso-
orecchie.
• Testina di taglio di precisione estraibile speciale
sopracciglia.
• Guida-taglio per sopracciglia a 2 altezze: 3 e 5 mm.
FUNZIONAMENTO DELL’APPARECCHIO
1. Per introdurre una pila svitare la parte inferiore
dell’apparecchio (Fig. 1).
2. Inserire una pila alcalina AA, con il morsetto positivo
rivolto verso il basso. (In caso di inutilizzo prolungato
dell’apparecchio o fine durata della pila, estrarre
quest’ultima dall’apparecchio. Questo contribuirà a
prolungarne la durata.)
3. Dopo aver inserito la pila, allineare la freccia con la tacca
sul coperchio della pila. Ruotare a destra per allineare
con il cerchio (Fig. 2)
4. Accendere il dispositivo girando a destra il coperchio
dalla batteria. Il dispositivo inizia a funzionare quando
il segno “I” è allineato alla tacca sul coperchio della
batteria”. (Fig. 2)
5. Dopo l’uso, spegnere il dispositivo allineando al cerchio
la tacca sul coperchio della batteria. (Fig. 2)
Attaccare e togliere le testine di taglio
Accertarsi che l’apparecchio sia spento.
- Rimuovere la testina di taglio dell’apparecchio ruotandola
no a fare coincidere il riferimento (I) con
IMPORTANT SAFETY
INSTRUCTIONS
READ ALL INSTRUCTIONS
BEFORE USING
FOR HOUSEHOLD
USE ONLY
KEEP AWAY FROM WATER
WARNING
1. Use close supervision when the appliance is
used by, on, or near children or individuals with
certain disabilities.
2. Use appliance only for its intended use as
described in this manual. Use only attachments
recommended by the manufacturer.
3. Never operate the appliance if it is not work-
ing properly, or has been dropped or damaged.
If appliance has fallen into water, do not
reach for it. Drain the water, let the unit dry, be
sure unit is off and then replace the battery.
4. Do not use the appliance with teeth missing
from the blades, as injury may result. Before
each use, make certain the blades are aligned
properly and oiled.
SAVE THESE
INSTRUCTIONS
TROUBLESHOOTING
There are several things to look for if your
trimmer fails to operate:
1. Be sure the trimmer is turned on.
2. Make sure that the battery is properly placed
in the battery compartment. Test the battery to
be sure it is working.
3. Check the blades to see if they are clogged
with hair clippings; if so, use a cleaning brush
to remove hair.
OPERATING
INSTRUCTIONS
1. To insert battery, remove compartment cover
by turning bottom piece of trimmer to the left,
then pulling straight down (Fig. 1).
2. Insert a AA battery, positive terminal
downward. (If you are not going to use the
device for long periods of time or if the battery
is dead, remove the battery from the device.
This will increase the battery's life.)
3. After inserting the battery, align the arrow
with the notch on battery cover and turn to the
right to align with the circle (Fig. 2).
*Do not use in the shower. To clean, simply
rinse trimmer blade under faucet.
4. Always purchase the correct size and grade
of battery most suitable for the intended use.
5. Clean the battery contacts and also those of
the device prior to battery installation.
6. Ensure the battery is installed correctly with
regard to polarity (+ and -).
7. Store unused batteries in their original
packaging, away from metal objects that could
short-circuit them. Never short-circuit batteries.
8. Never dispose of battery in fire, except under
conditions of controlled incineration. Failure
to observe this precaution may result in an
explosion. Never attempt to recharge primary
battery, as this may cause leakage, fire,
or explosion.
9. This appliance is not a toy. Keep away
from children.
GETTING STARTED
NOSE/EAR HAIR TRIMMER
Using the special circular cutting head for nose
and ears, gently insert the cutting head into the
nostril or ear and move it slightly back and forth
to cut the hair.
NOTE: To trim nose hair, insert trimmer at entry
of nostrils and start trimming the lower hairs
until no longer visible.
To trim ear hair, guide the trimmer around the
outer surface of the ear.
TO SWITCH TRIMMER HEADS
Check that the device is turned off.
• Remove the trimming head of the device by
turning it to line-up mark (
) with mark ( ).
Next, pull the head of the device upward (Fig. 3).
• Gently place the desired cutting head on the
device, then lock by turning the cutting head so
that the two marks line up (
and ) (Fig. 4).
DETAIL TRIMMER AND ATTACHMENTS
Use detail trimmer for sideburns, beard and
mustache, eyebrows, and all detail trimming:
Mustache
Attach detail trimmer and hold trimmer in an
upright position. Bring the tip of the blade
straight into the mustache to trim.
Neckline & Sideburns Attach detail trimmer
and hold the trimmer blade against the skin
at the length desired and move the trimmer
downward.
Comb Attachments
Attach comb to detail trimmer
(Fig. 5) and hold trimmer in
an upright position. Bring
the tip of the blade straight
into the mustache to trim.
2 combs (3 mm, 5 mm) are
included for a variety of
cutting lengths.
TAKING CARE OF YOUR TRIMMER
BLADE CARE
1. Brush away any loose hair that collects in
the blades.
2. Store trimmer in a safe location.
CLEANING TRIMMER
1. Make sure trimmer is OFF. To remove the
trimmer head for cleaning, turn the head
counterclockwise until the “I” mark aligns with
the arrow mark, then lift the head gently.
2. Rinse the head only under water. For proper
functioning of the unit, the handle cannot touch
or be immersed in water (Fig. 6).
3. After cleaning, make sure to shake the head
dry before reattaching it to the body.
4. To reattach the head onto the body, align the
“I” mark on the head with the arrow mark on
the body and then turn clockwise until the “I”
aligns with the circle mark on the body.
Fig.6
Fig. 3
Fig. 1 Fig. 2
Fig. 4
Fig. 5
bsnt1_19pl062448_ib_final 7-9-19.indd 1 7/9/2019 9:50 AM
. Quindi
tirare verso l’alto la testina dell’apparecchio (Fig. 3)
- Posizionare delicatamente la testina di taglio prevista
sull’apparecchio, quindi bloccarla facendola ruotare in
modo da fare coincidere i due riferimenti (I & 0) (Fig. 4).
Utilizzo della testina di taglio circolare speciale naso
e orecchie
Inserire delicatamente la testina di taglio circolare
nella narice o nel padiglione auricolare ed eseguire dei
movimenti leggeri avanti e indietro.
Utilizzo della testina di taglio di precisione speciale
naso e orecchie
Posizionamento del guida-taglio
Per posizionare il guida-taglio sulla testina di precisione
speciale sopracciglia, verificare preliminarmente che
l’apparecchio sia spento.
- Per un’altezza di taglio di 3 mm, cliccare sulla testina del
rasoio.
- Per un’altezza di taglio di 5 mm, cliccare sulla testina del
rasoio.
Accessori pettine
Attaccare il pettine alla sfoltitrice di precisione (Fig. 5).
Tenere la sfoltitrice in posizione eretta. Portare la punta
della lama all’interno delle sopracciglia per rasare.
2 pettini (3 mm, 5 mm) in dotazione per varie lunghezze
di taglio.
Consigli per l’utilizzo
Per denire la massa delle sopracciglia, lavorare partendo
dal bordo interno del sopracciglio e sfumare con
movimenti regolari verso l’esterno. Per iniziare e acquisire
familiarità con l’apparecchio, utilizzare l’altezza di taglio di
5 mm. Tagliare/rasare sempre nella direzione di crescita dei
peli senza premere sulla lama in quanto potrebbe essere
danneggiata o provocare lesioni. Con l’altra mano, tendere
la pelle per consentire una maggiore precisione di rasatura.
MANUTENZIONE
1. Controllare che la sfoltitrice sia su OFF. Per togliere
la testina e pulirla, ruotarla in senso orario no a far
allineare il segno «I» con la freccia, quindi sollevarla
delicatamente.
2. Sciacquare la testina sotto l’acqua. Per il corretto
funzionamento dell’apparecchio, il manico non può
toccare l’acqua, né esservi immerso (Fig. 6)
3. Dopo il lavaggio, asciugare bene la testina prima di
riattaccarla all’apparecchio.
4. Per riattaccare la testina all’apparecchio, allineare il segno
«I» sulla testina con il segno freccia sull’apparecchio,
quindi ruotare in senso orario no a far allineare il segno
«I» con il segno cerchio sull’apparecchio.
APARADOR PARA NARIZ/ORELHAS/SOBRANCELHAS
Leia atentamente estes conselhos de segurança antes de utilizar o
aparelho pela primeira vez.
Este aparador BaByliss permite eliminar rapidamente e com toda
a segurança os pelos indesejáveis e inestéticos das sobrancelhas,
do nariz e das orelhas.
CARACTERISTICAS
• Cabeça de corte circular amovível especial para nariz e orelhas.
• Cabeça de corte de precisão amovível especial para as
sobrancelhas.
• Guia de corte para cortar as sobrancelhas de acordo com 2
alturas: 3 e 5 mm.
COLOCAÇÃO DO APARELHO EM FUNCIONAMENTO
1. Para colocar uma pilha, desaparafuse a parte inferior do
aparelho (Fig. 1).
2. Introduza uma pilha alcalina AA, com o polo positivo virado
para baixo. (Retire a pilha do aparelho se este não for utilizado
durante longos períodos de tempo ou se a pilha estiver gasta.
Isso contribuirá para prolongar a vida útil das pilhas.)
3. Depois de introduzir a pilha, faça coincidir a seta com o entalhe
na tampa do compartimento das pilhas e rode para a direita
para fazer coincidir com o círculo (Fig. 2).
4. Ligue o dispositivo, rodando a tampa do compartimento das
pilhas para a direita, o dispositivo começa a funcionar quando
a marca “I” coincide com o entalhe na tampa do compartimento
das pilhas. (Fig. 2)
5. Depois de utilizar, desligue o dispositivo fazendo coincidir o
entalhe na tampa do compartimento das pilhas com o círculo.
(Fig. 2)
Colocação e remoção das cabeças de corte
Certique-se de que o aparelho está desligado.
- Retire a cabeça de corte do aparelho rodando-a para fazer
coincidir a marca (I) com a marca
IMPORTANT SAFETY
INSTRUCTIONS
READ ALL INSTRUCTIONS
BEFORE USING
FOR HOUSEHOLD
USE ONLY
KEEP AWAY FROM WATER
WARNING
1. Use close supervision when the appliance is
used by, on, or near children or individuals with
certain disabilities.
2. Use appliance only for its intended use as
described in this manual. Use only attachments
recommended by the manufacturer.
3. Never operate the appliance if it is not work-
ing properly, or has been dropped or damaged.
If appliance has fallen into water, do not
reach for it. Drain the water, let the unit dry, be
sure unit is off and then replace the battery.
4. Do not use the appliance with teeth missing
from the blades, as injury may result. Before
each use, make certain the blades are aligned
properly and oiled.
SAVE THESE
INSTRUCTIONS
TROUBLESHOOTING
There are several things to look for if your
trimmer fails to operate:
1. Be sure the trimmer is turned on.
2. Make sure that the battery is properly placed
in the battery compartment. Test the battery to
be sure it is working.
3. Check the blades to see if they are clogged
with hair clippings; if so, use a cleaning brush
to remove hair.
OPERATING
INSTRUCTIONS
1. To insert battery, remove compartment cover
by turning bottom piece of trimmer to the left,
then pulling straight down (Fig. 1).
2. Insert a AA battery, positive terminal
downward. (If you are not going to use the
device for long periods of time or if the battery
is dead, remove the battery from the device.
This will increase the battery's life.)
3. After inserting the battery, align the arrow
with the notch on battery cover and turn to the
right to align with the circle (Fig. 2).
*Do not use in the shower. To clean, simply
rinse trimmer blade under faucet.
4. Always purchase the correct size and grade
of battery most suitable for the intended use.
5. Clean the battery contacts and also those of
the device prior to battery installation.
6. Ensure the battery is installed correctly with
regard to polarity (+ and -).
7. Store unused batteries in their original
packaging, away from metal objects that could
short-circuit them. Never short-circuit batteries.
8. Never dispose of battery in fire, except under
conditions of controlled incineration. Failure
to observe this precaution may result in an
explosion. Never attempt to recharge primary
battery, as this may cause leakage, fire,
or explosion.
9. This appliance is not a toy. Keep away
from children.
GETTING STARTED
NOSE/EAR HAIR TRIMMER
Using the special circular cutting head for nose
and ears, gently insert the cutting head into the
nostril or ear and move it slightly back and forth
to cut the hair.
NOTE: To trim nose hair, insert trimmer at entry
of nostrils and start trimming the lower hairs
until no longer visible.
To trim ear hair, guide the trimmer around the
outer surface of the ear.
TO SWITCH TRIMMER HEADS
Check that the device is turned off.
• Remove the trimming head of the device by
turning it to line-up mark (
) with mark ( ).
Next, pull the head of the device upward (Fig. 3).
• Gently place the desired cutting head on the
device, then lock by turning the cutting head so
that the two marks line up (
and ) (Fig. 4).
DETAIL TRIMMER AND ATTACHMENTS
Use detail trimmer for sideburns, beard and
mustache, eyebrows, and all detail trimming:
Mustache
Attach detail trimmer and hold trimmer in an
upright position. Bring the tip of the blade
straight into the mustache to trim.
Neckline & Sideburns Attach detail trimmer
and hold the trimmer blade against the skin
at the length desired and move the trimmer
downward.
Comb Attachments
Attach comb to detail trimmer
(Fig. 5) and hold trimmer in
an upright position. Bring
the tip of the blade straight
into the mustache to trim.
2 combs (3 mm, 5 mm) are
included for a variety of
cutting lengths.
TAKING CARE OF YOUR TRIMMER
BLADE CARE
1. Brush away any loose hair that collects in
the blades.
2. Store trimmer in a safe location.
CLEANING TRIMMER
1. Make sure trimmer is OFF. To remove the
trimmer head for cleaning, turn the head
counterclockwise until the “I” mark aligns with
the arrow mark, then lift the head gently.
2. Rinse the head only under water. For proper
functioning of the unit, the handle cannot touch
or be immersed in water (Fig. 6).
3. After cleaning, make sure to shake the head
dry before reattaching it to the body.
4. To reattach the head onto the body, align the
“I” mark on the head with the arrow mark on
the body and then turn clockwise until the “I”
aligns with the circle mark on the body.
Fig.6
Fig. 3
Fig. 1 Fig. 2
Fig. 4
Fig. 5
bsnt1_19pl062448_ib_final 7-9-19.indd 1 7/9/2019 9:50 AM
. Depois, puxe a cabeça do
aparelho para cima (Fig. 3)
- Coloque cuidadosamente a cabeça de corte desejada no
aparelho e depois encaixe-a rodando-a para fazer coincidir as
duas marcas (I & 0) (Fig. 4).
Utilização da cabeça de corte circular especial para o nariz e
as orelhas
Introduza cuidadosamente a cabeça de corte circular na narina ou
no pavilhão da orelha e faça ligeiros movimentos de vai-e-vem.
Utilização da cabeça de corte de precisão especial para as
sobrancelhas
Colocação do guia de corte
Para colocar o guia de corte na cabeça de precisão especial para
as sobrancelhas, certique-se previamente de que o aparelho está
desligado.
- Para uma altura de corte de 3 mm, encaixe na cabeça do aparador.
- Para uma altura de corte de 5 mm, encaixe na cabeça do aparador.
Guias de corte
Monte o guia na cabeça de corte de precisão (Fig. 5) e segure no
aparador na posição vertical. Aproxime a ponta da lâmina das
sobrancelhas para aparar.
Inclui 2 guias de corte (3 mm, 5 mm) para várias alturas de corte.
Conselhos de utilização
Para reduzir a espessura das sobrancelhas, trabalhe a partir da
extremidade interna da sobrancelha e apare fazendo movimentos
regulares na direção da extremidade externa. Utilize a altura
de corte de 5 mm para começar e para se familiarizar com o
aparelho. Corte/apare sempre no sentido do crescimento dos
pelos sem exercer pressão sobre a lâmina pois isso pode danicá-
la ou provocar ferimentos. Estique a pele com a mão livre para
conseguir aparar o mais rente possível.
MANUTENÇÃO
1. Conrme que o aparelho está desligado (OFF).Para remover
a cabeça do aparador para limpar, rode a cabeça no sentido
contrário ao dos ponteiros do relógio para fazer coincidir a marca
«I» com a seta e, seguidamente, levante a cabeça com cuidado.
2. Lave a cabeça do aparelho apenas em água corrente. Para o
funcionamento correcto do aparelho, o corpo não pode entrar
em contacto ou ser mergulhado em água (Fig. 6)
3. Após a limpeza, seque bem a cabeça antes de a voltar a montar
no corpo do aparelho.
4. Para voltar a montar a cabeça no corpo do aparelho, faça coincidir
a marca «I» na cabeça com a seta no corpo e, seguidamente,
rode-a no sentido dos ponteiros do relógio até fazer coincidir a
marca «I» com o círculo no corpo do aparelho.
NOSE/EAR/EYEBROW HAIR TRIMMER
Please carefully read the instructions for use below
before using the appliance.
This BaByliss trimmer safely and quickly trims unwanted
or unsightly eyebrow, nose and ear hair.
FEATURES
• Special nose-ears removable circular cutting head.
• Special removable precision cutting head for eyebrows.
• Cutting guide to cut eyebrows at 2 heights: 3 and 5 mm.
TO OPERATE THE DEVICE
1. To insert a battery, unscrew the bottom part of the
device (Fig. 1)
2. Insert an AA alkaline battery, positive terminal
downwards. (If you are not going to use the device for
long periods of time or if the battery is dead, remove
the battery from the device. This will increase the
trimmer’s life.)
3. After inserting the battery,align the arrow with the
notch on battery cover and turn to the right to align
with the circle(Fig.2)
4. Turn on the device by twisting the battery cover to the
right, the device will start to work when the “ I” mark
and the notch on battery cover are aligned. (Fig.2)
5. After use, turn o the power by making the notch of the
battery cover align with the circle. (Fig.2)
Attaching and removing the cutting heads
Check that the device is turned o.
- Remove the cutting head of the device by turning it to
line up mark ( I) with mark
IMPORTANT SAFETY
INSTRUCTIONS
READ ALL INSTRUCTIONS
BEFORE USING
FOR HOUSEHOLD
USE ONLY
KEEP AWAY FROM WATER
WARNING
1. Use close supervision when the appliance is
used by, on, or near children or individuals with
certain disabilities.
2. Use appliance only for its intended use as
described in this manual. Use only attachments
recommended by the manufacturer.
3. Never operate the appliance if it is not work-
ing properly, or has been dropped or damaged.
If appliance has fallen into water, do not
reach for it. Drain the water, let the unit dry, be
sure unit is off and then replace the battery.
4. Do not use the appliance with teeth missing
from the blades, as injury may result. Before
each use, make certain the blades are aligned
properly and oiled.
SAVE THESE
INSTRUCTIONS
TROUBLESHOOTING
There are several things to look for if your
trimmer fails to operate:
1. Be sure the trimmer is turned on.
2. Make sure that the battery is properly placed
in the battery compartment. Test the battery to
be sure it is working.
3. Check the blades to see if they are clogged
with hair clippings; if so, use a cleaning brush
to remove hair.
OPERATING
INSTRUCTIONS
1. To insert battery, remove compartment cover
by turning bottom piece of trimmer to the left,
then pulling straight down (Fig. 1).
2. Insert a AA battery, positive terminal
downward. (If you are not going to use the
device for long periods of time or if the battery
is dead, remove the battery from the device.
This will increase the battery's life.)
3. After inserting the battery, align the arrow
with the notch on battery cover and turn to the
right to align with the circle (Fig. 2).
*Do not use in the shower. To clean, simply
rinse trimmer blade under faucet.
4. Always purchase the correct size and grade
of battery most suitable for the intended use.
5. Clean the battery contacts and also those of
the device prior to battery installation.
6. Ensure the battery is installed correctly with
regard to polarity (+ and -).
7. Store unused batteries in their original
packaging, away from metal objects that could
short-circuit them. Never short-circuit batteries.
8. Never dispose of battery in fire, except under
conditions of controlled incineration. Failure
to observe this precaution may result in an
explosion. Never attempt to recharge primary
battery, as this may cause leakage, fire,
or explosion.
9. This appliance is not a toy. Keep away
from children.
GETTING STARTED
NOSE/EAR HAIR TRIMMER
Using the special circular cutting head for nose
and ears, gently insert the cutting head into the
nostril or ear and move it slightly back and forth
to cut the hair.
NOTE: To trim nose hair, insert trimmer at entry
of nostrils and start trimming the lower hairs
until no longer visible.
To trim ear hair, guide the trimmer around the
outer surface of the ear.
TO SWITCH TRIMMER HEADS
Check that the device is turned off.
• Remove the trimming head of the device by
turning it to line-up mark (
) with mark ( ).
Next, pull the head of the device upward (Fig. 3).
• Gently place the desired cutting head on the
device, then lock by turning the cutting head so
that the two marks line up (
and ) (Fig. 4).
DETAIL TRIMMER AND ATTACHMENTS
Use detail trimmer for sideburns, beard and
mustache, eyebrows, and all detail trimming:
Mustache
Attach detail trimmer and hold trimmer in an
upright position. Bring the tip of the blade
straight into the mustache to trim.
Neckline & Sideburns Attach detail trimmer
and hold the trimmer blade against the skin
at the length desired and move the trimmer
downward.
Comb Attachments
Attach comb to detail trimmer
(Fig. 5) and hold trimmer in
an upright position. Bring
the tip of the blade straight
into the mustache to trim.
2 combs (3 mm, 5 mm) are
included for a variety of
cutting lengths.
TAKING CARE OF YOUR TRIMMER
BLADE CARE
1. Brush away any loose hair that collects in
the blades.
2. Store trimmer in a safe location.
CLEANING TRIMMER
1. Make sure trimmer is OFF. To remove the
trimmer head for cleaning, turn the head
counterclockwise until the “I” mark aligns with
the arrow mark, then lift the head gently.
2. Rinse the head only under water. For proper
functioning of the unit, the handle cannot touch
or be immersed in water (Fig. 6).
3. After cleaning, make sure to shake the head
dry before reattaching it to the body.
4. To reattach the head onto the body, align the
“I” mark on the head with the arrow mark on
the body and then turn clockwise until the “I”
aligns with the circle mark on the body.
Fig.6
Fig. 3
Fig. 1 Fig. 2
Fig. 4
Fig. 5
bsnt1_19pl062448_ib_final 7-9-19.indd 1 7/9/2019 9:50 AM
. Next pull the head of the
device upwards (Fig. 3)
- Gently place the desired cutting head on the device,
then lock by turning the cutting head so that the two
marks line up ( I & 0 ) (Fig. 4).
Using the special circular cutting head for nose and
ears
Gently insert the circular cutting head into the nostril or
ear and to cut the hair, and move it slightly back and forth.
Using the special precision cutting head for eyebrows
Putting the cutting guide in place
To put the cutting guide in place on the special precision
cutting head eyebrows, rst ensure the device is turned
o.
- For a 3 mm cutting height, click onto the trimmer head.
- For a 5 mm cutting height, click onto the trimmer head.
Comb Attachments
Attach comb to detail trimmer(Fig.5)and hold trimmer in
an upright position.Bring the tip of the blade stright into
the eyebrows to trim.
2.comb (3mm,5mm) are included for a variety of cutting
lengths.
Instructions for use
To rene the eyebrow mass, work by starting from the
inside edge of the eyebrow and trim outwards with even
movements. Use the 5 mm cutting height for a start and
to familiarise yourself with the device. Always cut / shave
in the direction of hair growth without pressing on the
blade, which could damage it or cause an injury. Stretch
out the skin with your free hand to enable a closer shave.
MAINTENANCE
1.Make sure trimmer is OFF.To remove the trimmer head
for cleaning,turn the head counterclockwise until the «I»
mark aligns with the arrow mark,then lift the head gently.
2.Rinse the head only under water.For prper functioning
of the unit,the handle cannot touch or be immersed in
water(Fig.6)
3.After cleaning,make sure to shake the head dry before
reattaching it to the body.
4.To reattach the head onto the body,align the «I» mark
on the head with the arrow mark on the body and then
turn clockwise until the «I» aligns with the circle mark on
the body.
TRIMMER VOOR NEUS/OREN/WENKBRAUWEN
Lees deze veiligheidsrichtlijnen aandachtig voordat u het
apparaat gebruikt!
Met deze trimmer van BaByliss verwijdert u snel en veilig
ongewenste haartjes in de neus, oren en wenkbrauwen.
EIGENSCHAPPEN
• Afneembare ronde kop speciaal voor neus en oren.
• Afneembare precisiekop speciaal voor wenkbrauwen.
• Trimgeleider om de wenkbrauwen in model te brengen, met
2 trimhoogtes: 3 en 5 mm.
GEBRUIK VAN HET APPARAAT
1. Schroef het onderste deel van het apparaat los om een
batterij te plaatsen (g. 1).
2. Plaats een alkalinebatterij AA, met de positieve pool naar
onder. (Verwijder de batterij wanneer u het apparaat langere
tijd niet gebruikt en zodra de batterij leeg is. Dit verlengt de
levensduur van het apparaat.)
3. Nadat u de batterij heeft geplaatst, de pijl op één lijn brengen
met de inkeping op het batterijklepje en naar rechts draaien
om op één lijn te komen met het rondje (Afb. 2).
4. Zet het apparaat aan door het batterijkapje naar rechts te
draaien. De trimmer gaat aan als de markering ‘I’ tegenover
de inkeping op het batterijkapje staat. (Afb. 2)
5. Zet het apparaat na gebruik uit door de inkeping op het
batterijkapje tegenover het rondje te plaatsen. (Afb. 2)
Het plaatsen en verwijderen van de trimgeleiders
Zorg ervoor dat het apparaat uitgeschakeld is.
- Verwijder de kop van het apparaat door hem te draaien
zodat de markering (
I
) samenvalt met de markering
IMPORTANT SAFETY
INSTRUCTIONS
READ ALL INSTRUCTIONS
BEFORE USING
FOR HOUSEHOLD
USE ONLY
KEEP AWAY FROM WATER
WARNING
1. Use close supervision when the appliance is
used by, on, or near children or individuals with
certain disabilities.
2. Use appliance only for its intended use as
described in this manual. Use only attachments
recommended by the manufacturer.
3. Never operate the appliance if it is not work-
ing properly, or has been dropped or damaged.
If appliance has fallen into water, do not
reach for it. Drain the water, let the unit dry, be
sure unit is off and then replace the battery.
4. Do not use the appliance with teeth missing
from the blades, as injury may result. Before
each use, make certain the blades are aligned
properly and oiled.
SAVE THESE
INSTRUCTIONS
TROUBLESHOOTING
There are several things to look for if your
trimmer fails to operate:
1. Be sure the trimmer is turned on.
2. Make sure that the battery is properly placed
in the battery compartment. Test the battery to
be sure it is working.
3. Check the blades to see if they are clogged
with hair clippings; if so, use a cleaning brush
to remove hair.
OPERATING
INSTRUCTIONS
1. To insert battery, remove compartment cover
by turning bottom piece of trimmer to the left,
then pulling straight down (Fig. 1).
2. Insert a AA battery, positive terminal
downward. (If you are not going to use the
device for long periods of time or if the battery
is dead, remove the battery from the device.
This will increase the battery's life.)
3. After inserting the battery, align the arrow
with the notch on battery cover and turn to the
right to align with the circle (Fig. 2).
*Do not use in the shower. To clean, simply
rinse trimmer blade under faucet.
4. Always purchase the correct size and grade
of battery most suitable for the intended use.
5. Clean the battery contacts and also those of
the device prior to battery installation.
6. Ensure the battery is installed correctly with
regard to polarity (+ and -).
7. Store unused batteries in their original
packaging, away from metal objects that could
short-circuit them. Never short-circuit batteries.
8. Never dispose of battery in fire, except under
conditions of controlled incineration. Failure
to observe this precaution may result in an
explosion. Never attempt to recharge primary
battery, as this may cause leakage, fire,
or explosion.
9. This appliance is not a toy. Keep away
from children.
GETTING STARTED
NOSE/EAR HAIR TRIMMER
Using the special circular cutting head for nose
and ears, gently insert the cutting head into the
nostril or ear and move it slightly back and forth
to cut the hair.
NOTE: To trim nose hair, insert trimmer at entry
of nostrils and start trimming the lower hairs
until no longer visible.
To trim ear hair, guide the trimmer around the
outer surface of the ear.
TO SWITCH TRIMMER HEADS
Check that the device is turned off.
• Remove the trimming head of the device by
turning it to line-up mark (
) with mark ( ).
Next, pull the head of the device upward (Fig. 3).
• Gently place the desired cutting head on the
device, then lock by turning the cutting head so
that the two marks line up (
and ) (Fig. 4).
DETAIL TRIMMER AND ATTACHMENTS
Use detail trimmer for sideburns, beard and
mustache, eyebrows, and all detail trimming:
Mustache
Attach detail trimmer and hold trimmer in an
upright position. Bring the tip of the blade
straight into the mustache to trim.
Neckline & Sideburns Attach detail trimmer
and hold the trimmer blade against the skin
at the length desired and move the trimmer
downward.
Comb Attachments
Attach comb to detail trimmer
(Fig. 5) and hold trimmer in
an upright position. Bring
the tip of the blade straight
into the mustache to trim.
2 combs (3 mm, 5 mm) are
included for a variety of
cutting lengths.
TAKING CARE OF YOUR TRIMMER
BLADE CARE
1. Brush away any loose hair that collects in
the blades.
2. Store trimmer in a safe location.
CLEANING TRIMMER
1. Make sure trimmer is OFF. To remove the
trimmer head for cleaning, turn the head
counterclockwise until the “I” mark aligns with
the arrow mark, then lift the head gently.
2. Rinse the head only under water. For proper
functioning of the unit, the handle cannot touch
or be immersed in water (Fig. 6).
3. After cleaning, make sure to shake the head
dry before reattaching it to the body.
4. To reattach the head onto the body, align the
“I” mark on the head with the arrow mark on
the body and then turn clockwise until the “I”
aligns with the circle mark on the body.
Fig.6
Fig. 3
Fig. 1 Fig. 2
Fig. 4
Fig. 5
bsnt1_19pl062448_ib_final 7-9-19.indd 1 7/9/2019 9:50 AM
. Trek
vervolgens de kop omhoog (g. 3).
- Plaats de gewenste kop voorzichtig op het apparaat.
Vergrendel de kop door hem te draaien tot de twee
markeringen samenvallen (
I & 0
) (g. 4).
Gebruik van de ronde kop speciaal voor neus en oren
Ga met de ronde kop voorzichtig in het neusgat of de oorschelp
en beweeg zachtjes heen en weer.
Gebruik van de precisiekop speciaal voor
wenkbrauwen
De trimgeleider plaatsen
Zorg er altijd voor dat het apparaat uitgeschakeld is voor u de
trimgeleider op de precisiekop speciaal voor wenkbrauwen
plaatst.
- Voor een trimhoogte van 3 mm, vastklikken op de trimkop.
- Voor een trimhoogte van 5 mm, vastklikken op de trimkop.
Opzetkammen
Bevestig de kam op de precisiekop (Afb.5) en houd de
trimmer rechtop. Zet het uiteinde van het mes recht op de
wenkbrauwen om ze te trimmen.
Er worden 2 opzetkammen (van 3 mm en 5 mm) meegeleverd
voor verschillende trimhoogtes.
Gebruikstips
Zo dunt u wenkbrauwen uit: begin aan de binnenkant van de
wenkbrauw en dun ze uit door het apparaat met regelmatige
bewegingen naar de buitenkant te bewegen. Gebruik de
trimhoogte van 5 mm om te beginnen en vertrouwd te geraken
met het apparaat. Trim/scheer altijd in de groeirichting van de
haartjes, zonder op het mes te duwen. Dit kan het apparaat
beschadigen of een wondje veroorzaken. Span de huid met
uw vrije hand aan voor een heel precieze scheerbeurt.
ONDERHOUD
1. Zorg dat de trimmer uit staat. Om de trimkop te verwijderen
om hem schoon te maken, draait u de kop linksom totdat de
markering ‘I’ op één lijn staat met de pijl, en haal vervolgens
de kop voorzichtig los.
2. Spoel de kop af onder de kraan. Voor een goede werking
van het apparaat, dient het handvat niet te worden
ondergedompeld in water. (Afb.6)
3. Schud na het reinigen de kop droog voordat u deze weer
terugplaatst.
4. Om de kop weer terug te plaatsen, de markering ‘I’ op de
kop op één lijn plaatsen met de pijl op het apparaat en
vervolgens de kop naar rechts draaien tot de markering ‘I’ op
één lijn staat met het rondje op het apparaat (Afb. 2).
CORTAPELO NARIZ/OREJAS/CEJAS
¡Lea atentamente estas consignas de seguridad antes de
utilizar el aparato!
Este cortapelo de BaByliss permite cortar rápidamente y
con toda seguridad el vello no deseado o antiestético de
cejas, nariz y orejas.
CARACTERISTICAS
• Cabezal de corte circular desmontable especial para nariz
- orejas.
• Cabezal de corte de precisión desmontable especial para
cejas.
• Guía de corte para recortar las cejas a 2 alturas: 3 y 5 mm.
PUESTA EN FUNCIONAMIENTO DEL APARATO
1. Para colocar una pila, desenrosque la parte inferior del
aparato (Fig. 1).
2. Coloque una pila alcalina AA, con el polo positivo hacia
abajo. (Retire la pila del aparato si no lo utiliza durante
periodos largos o si la pila está descargada. Esto ayudará
a prolongar su vida útil).
3. Una vez introducida la pila, haga que la echa coincida
con la muesca de la tapa y gire hacia la derecha para que
coincida con el círculo (Fig.2)
4. Encienda el dispositivo girando la tapa de la batería hacia
la derecha. El dispositivo comenzará a funcionar cuando
la marca « I « y la muesca en la tapa de la batería están
alineadas. (Fig.2)
5. Cuando termine de usarlo, apague el dispositivo
alineando la muesca de la tapa de la batería con el
círculo. (Fig.2)
Retirar y colocar los cabezales de corte
Compruebe que el aparato está apagado.
- Retire el cabezal de corte del aparato girándolo hasta
que la marca (I) coincida con la marca
IMPORTANT SAFETY
INSTRUCTIONS
READ ALL INSTRUCTIONS
BEFORE USING
FOR HOUSEHOLD
USE ONLY
KEEP AWAY FROM WATER
WARNING
1. Use close supervision when the appliance is
used by, on, or near children or individuals with
certain disabilities.
2. Use appliance only for its intended use as
described in this manual. Use only attachments
recommended by the manufacturer.
3. Never operate the appliance if it is not work-
ing properly, or has been dropped or damaged.
If appliance has fallen into water, do not
reach for it. Drain the water, let the unit dry, be
sure unit is off and then replace the battery.
4. Do not use the appliance with teeth missing
from the blades, as injury may result. Before
each use, make certain the blades are aligned
properly and oiled.
SAVE THESE
INSTRUCTIONS
TROUBLESHOOTING
There are several things to look for if your
trimmer fails to operate:
1. Be sure the trimmer is turned on.
2. Make sure that the battery is properly placed
in the battery compartment. Test the battery to
be sure it is working.
3. Check the blades to see if they are clogged
with hair clippings; if so, use a cleaning brush
to remove hair.
OPERATING
INSTRUCTIONS
1. To insert battery, remove compartment cover
by turning bottom piece of trimmer to the left,
then pulling straight down (Fig. 1).
2. Insert a AA battery, positive terminal
downward. (If you are not going to use the
device for long periods of time or if the battery
is dead, remove the battery from the device.
This will increase the battery's life.)
3. After inserting the battery, align the arrow
with the notch on battery cover and turn to the
right to align with the circle (Fig. 2).
*Do not use in the shower. To clean, simply
rinse trimmer blade under faucet.
4. Always purchase the correct size and grade
of battery most suitable for the intended use.
5. Clean the battery contacts and also those of
the device prior to battery installation.
6. Ensure the battery is installed correctly with
regard to polarity (+ and -).
7. Store unused batteries in their original
packaging, away from metal objects that could
short-circuit them. Never short-circuit batteries.
8. Never dispose of battery in fire, except under
conditions of controlled incineration. Failure
to observe this precaution may result in an
explosion. Never attempt to recharge primary
battery, as this may cause leakage, fire,
or explosion.
9. This appliance is not a toy. Keep away
from children.
GETTING STARTED
NOSE/EAR HAIR TRIMMER
Using the special circular cutting head for nose
and ears, gently insert the cutting head into the
nostril or ear and move it slightly back and forth
to cut the hair.
NOTE: To trim nose hair, insert trimmer at entry
of nostrils and start trimming the lower hairs
until no longer visible.
To trim ear hair, guide the trimmer around the
outer surface of the ear.
TO SWITCH TRIMMER HEADS
Check that the device is turned off.
• Remove the trimming head of the device by
turning it to line-up mark (
) with mark ( ).
Next, pull the head of the device upward (Fig. 3).
• Gently place the desired cutting head on the
device, then lock by turning the cutting head so
that the two marks line up (
and ) (Fig. 4).
DETAIL TRIMMER AND ATTACHMENTS
Use detail trimmer for sideburns, beard and
mustache, eyebrows, and all detail trimming:
Mustache
Attach detail trimmer and hold trimmer in an
upright position. Bring the tip of the blade
straight into the mustache to trim.
Neckline & Sideburns Attach detail trimmer
and hold the trimmer blade against the skin
at the length desired and move the trimmer
downward.
Comb Attachments
Attach comb to detail trimmer
(Fig. 5) and hold trimmer in
an upright position. Bring
the tip of the blade straight
into the mustache to trim.
2 combs (3 mm, 5 mm) are
included for a variety of
cutting lengths.
TAKING CARE OF YOUR TRIMMER
BLADE CARE
1. Brush away any loose hair that collects in
the blades.
2. Store trimmer in a safe location.
CLEANING TRIMMER
1. Make sure trimmer is OFF. To remove the
trimmer head for cleaning, turn the head
counterclockwise until the “I” mark aligns with
the arrow mark, then lift the head gently.
2. Rinse the head only under water. For proper
functioning of the unit, the handle cannot touch
or be immersed in water (Fig. 6).
3. After cleaning, make sure to shake the head
dry before reattaching it to the body.
4. To reattach the head onto the body, align the
“I” mark on the head with the arrow mark on
the body and then turn clockwise until the “I”
aligns with the circle mark on the body.
Fig.6
Fig. 3
Fig. 1 Fig. 2
Fig. 4
Fig. 5
bsnt1_19pl062448_ib_final 7-9-19.indd 1 7/9/2019 9:50 AM
y tire de él hacia
arriba (Fig. 3).
- Coloque con cuidado el cabezal de corte sobre el aparato
y encájelo girándolo hasta que coincidan las dos marcas
(I & 0) (Fig. 4).
Utilización del cabezal de corte circular especial para
nariz y orejas
Introduzca con cuidado el cabezal de corte circular
en el oricio de la nariz o de la oreja y efectúe ligeros
movimientos de vaivén.
Utilización del cabezal de corte de precisión especial
para cejas
Colocación de la guía de corte
Para colocar la guía de corte en el cabezal de precisión
especial para cejas, asegúrese de antemano que el aparato
está apagado.
- Para una altura de corte de 3 mm, enganche la guía en el
cabezal de corte.
- Para una altura de corte de 5 mm, enganche la guía en el
cabezal de corte.
Peines
Coloque el peine en el cortapelo de precisión (Fig.5) y
sujete el cortapelo en posición vertical, llevando la punta
de la hoja hacia las cejas.
2. Los peines incluidos (3 mm,5 mm) permiten variar la
longitud de corte.
Consejos de uso
Para anar la masa de las cejas, trabaje partiendo del borde
interno de la ceja y vaya recortando con movimientos
regulares hacia el exterior. Utilice la altura de corte de 5
mm para comenzar y para familiarizarse con el aparato.
Corte / afeite siempre en el sentido del nacimiento del vello
sin apoyar la cuchilla, ya que podría dañarla o provocar una
herida. Tense la piel con la mano libre para cortar lo más
cerca posible.
MANTENIMIENTO
1. Compruebe que el cortapelo está apagado. Para quitar
el cabezal de corte para su limpieza, gírelo en sentido
antihorario hasta que la marca «I» se alinee con la
marca de la echa y, a continuación, levante el cabezal
suavemente.
2. El cabezal se puede aclarar con agua corriente, pero no
moje el cuerpo del aparato ni lo sumerja en agua (Fig.6)
3. Después de la limpieza, agite el cabezal para secarlo
antes de volver a jarlo al cuerpo.
4. Para volver a montar el cabezal de corte, debe alinear la
marca «I» del cabezal con la echa del cuerpo y luego
girar en sentido horario hasta que la marca «I» quede
alineada con el círculo del cuerpo del aparato.
KLIPPEMASKINE TIL NÆSE/ØRER/ØJENBRYN
Læs sikkerhedsforanstaltningerne omhyggeligt inden
apparatet tages i brug.
Denne klippemaskine fra BaByliss gør det muligt at erne
uønskede eller skæmmende hår fra øjenbryn, i næse og ører
på en hurtig og sikker måde.
EGENSKABER
• Aftageligt, cirkelformet klippehoved specielt til næse og
ører.
• Aftageligt klippehoved, specielt til præcisionsklipning af
øjenbryn.
• Afstandskam til trimning af øjenbryn i 2 forskellige længder:
3 og 5 mm.
START AF APPARATET
1. For isætning af batteri skal den nedre del af apparatet
skrues af (Fig. 1).
2. Indsæt et alkalisk AA-batteri, med positiv pol nedefter.
(Hvis apparatet ikke skal bruges i længere perioder, eller
hvis batteriet er aadet, skal batteriet tages ud af apparatet.
Dette bidrager også til at forlænge batteriets levetid).
3. Når batteriet er sat i, skal dreje pilen, så den ugter med
hakket på batteridækslet, og dreje til højre for at justere
cirklen (Fig. 2).
4. Tænd for apparatet ved at dreje batteridækslet til højre,
enheden begynder at køre, når ”I”-mærket og hakket på
batteridækslet ugter med hinanden (Fig. 2).
5. Efter brug skal du slukke for strømmen ved at få hakket på
batteridækslet til at ugte med cirklen (Fig. 2).
Montering og ernelse af skærehoveder
Tjek, at der er slukket for apparatet.
- Fjern klippehovedet fra apparatet ved at vippe det, så
mærket (I) står overfor mærket
IMPORTANT SAFETY
INSTRUCTIONS
READ ALL INSTRUCTIONS
BEFORE USING
FOR HOUSEHOLD
USE ONLY
KEEP AWAY FROM WATER
WARNING
1. Use close supervision when the appliance is
used by, on, or near children or individuals with
certain disabilities.
2. Use appliance only for its intended use as
described in this manual. Use only attachments
recommended by the manufacturer.
3. Never operate the appliance if it is not work-
ing properly, or has been dropped or damaged.
If appliance has fallen into water, do not
reach for it. Drain the water, let the unit dry, be
sure unit is off and then replace the battery.
4. Do not use the appliance with teeth missing
from the blades, as injury may result. Before
each use, make certain the blades are aligned
properly and oiled.
SAVE THESE
INSTRUCTIONS
TROUBLESHOOTING
There are several things to look for if your
trimmer fails to operate:
1. Be sure the trimmer is turned on.
2. Make sure that the battery is properly placed
in the battery compartment. Test the battery to
be sure it is working.
3. Check the blades to see if they are clogged
with hair clippings; if so, use a cleaning brush
to remove hair.
OPERATING
INSTRUCTIONS
1. To insert battery, remove compartment cover
by turning bottom piece of trimmer to the left,
then pulling straight down (Fig. 1).
2. Insert a AA battery, positive terminal
downward. (If you are not going to use the
device for long periods of time or if the battery
is dead, remove the battery from the device.
This will increase the battery's life.)
3. After inserting the battery, align the arrow
with the notch on battery cover and turn to the
right to align with the circle (Fig. 2).
*Do not use in the shower. To clean, simply
rinse trimmer blade under faucet.
4. Always purchase the correct size and grade
of battery most suitable for the intended use.
5. Clean the battery contacts and also those of
the device prior to battery installation.
6. Ensure the battery is installed correctly with
regard to polarity (+ and -).
7. Store unused batteries in their original
packaging, away from metal objects that could
short-circuit them. Never short-circuit batteries.
8. Never dispose of battery in fire, except under
conditions of controlled incineration. Failure
to observe this precaution may result in an
explosion. Never attempt to recharge primary
battery, as this may cause leakage, fire,
or explosion.
9. This appliance is not a toy. Keep away
from children.
GETTING STARTED
NOSE/EAR HAIR TRIMMER
Using the special circular cutting head for nose
and ears, gently insert the cutting head into the
nostril or ear and move it slightly back and forth
to cut the hair.
NOTE: To trim nose hair, insert trimmer at entry
of nostrils and start trimming the lower hairs
until no longer visible.
To trim ear hair, guide the trimmer around the
outer surface of the ear.
TO SWITCH TRIMMER HEADS
Check that the device is turned off.
• Remove the trimming head of the device by
turning it to line-up mark (
) with mark ( ).
Next, pull the head of the device upward (Fig. 3).
• Gently place the desired cutting head on the
device, then lock by turning the cutting head so
that the two marks line up (
and ) (Fig. 4).
DETAIL TRIMMER AND ATTACHMENTS
Use detail trimmer for sideburns, beard and
mustache, eyebrows, and all detail trimming:
Mustache
Attach detail trimmer and hold trimmer in an
upright position. Bring the tip of the blade
straight into the mustache to trim.
Neckline & Sideburns Attach detail trimmer
and hold the trimmer blade against the skin
at the length desired and move the trimmer
downward.
Comb Attachments
Attach comb to detail trimmer
(Fig. 5) and hold trimmer in
an upright position. Bring
the tip of the blade straight
into the mustache to trim.
2 combs (3 mm, 5 mm) are
included for a variety of
cutting lengths.
TAKING CARE OF YOUR TRIMMER
BLADE CARE
1. Brush away any loose hair that collects in
the blades.
2. Store trimmer in a safe location.
CLEANING TRIMMER
1. Make sure trimmer is OFF. To remove the
trimmer head for cleaning, turn the head
counterclockwise until the “I” mark aligns with
the arrow mark, then lift the head gently.
2. Rinse the head only under water. For proper
functioning of the unit, the handle cannot touch
or be immersed in water (Fig. 6).
3. After cleaning, make sure to shake the head
dry before reattaching it to the body.
4. To reattach the head onto the body, align the
“I” mark on the head with the arrow mark on
the body and then turn clockwise until the “I”
aligns with the circle mark on the body.
Fig.6
Fig. 3
Fig. 1 Fig. 2
Fig. 4
Fig. 5
bsnt1_19pl062448_ib_final 7-9-19.indd 1 7/9/2019 9:50 AM
. Træk dernæst apparatets
hoved opad (Fig. 3).
- Sæt forsigtigt det ønskede klippehoved på apparatet, og lås
det ved at få de to mærker (I & 0) til at stå overfor hinanden
(Fig. 4).
Brug af klippehovedet med cirkulært klippesystem,
specielt til næse og ører
Indfør forsigtigt det cirkelformede klippehoved i næsen
eller det ydre øre og foretag lette fremad- og tilbagegående
bevægelse.
Brug af klippehovedet specielt til præcisionstrimning af
øjenbryn
Påsætning af afstandskammen
Når afstandskammen sættes på klippehovedet specielt til
præcisionsklipning af øjenbryn, skal det sikres, at apparatet
er slukket.
- Klik på trimmerhovedet for en 3 mm klippehøjde.
- Klik på trimmerhovedet for en 5 mm klippehøjde.
Tilbehørskamme
Fastgør kammen til detaljetrimmeren (Fig. 5) og hold
trimmeren i lodret stilling. Træk spidsen af bladet lige ind i
øjenbrynene for at trimme.
Der medfølger to kamme (3 mm, 5 mm), som kan bruges til en
række klippelængder.
Råd til brugeren
Hvis du vil udtynde dine øjenbryn, skal du klippe øjenbrynets
inderkant, og tynde ud med jævne bevægelser ud over. Brug
afstandskammen på 5 mm til at begynde med samt til at blive
fortrolig med med apparatet. Klip/barber altid i hårvækstens
retning uden at lægge tryk på bladet, da dette kan beskadige
bladet eller forårsage hudskade. Stram huden med den frie
hånd for opnå en barbering tættere på huden.
VEDLIGEHOLDELSE
1. Sørg for, at trimmeren er slukket. For at fjerne
trimmerhovedet for rengøring skal du dreje hovedet mod
uret, indtil ”I”-mærket ugter med pilemarkeringen, og
derefter løfte hovedet forsigtigt.
2. Skyl kun hovedet under vand. For at opretholde korrekt
enhedsfunktion må håndtaget ikke røre ved eller blive
nedsænket i vand (Fig. 6).
3. Efter rengøring skal du sørge for at ryste hovedet tørt,
inden du sætter det på igen.
4. For at sætte hovedet på igen, justeres ”I”-mærket på
hovedet med pilen på hoveddelen og drejes derefter
med uret, indtil ”I”-mærket ugter med ”cirkel”-mærket på
hoveddelen.
Fabriqué en Chine
Made in China
BABYLISS SARL
99 avenue Aristide Briand
92120 Montrouge
France
www.babyliss.com
FAC / 2020/04
TRIMMER FÜR NASE/OHREN/AUGENBRAUEN
Lesen Sie vor jeglichem Gebrauch des Geräts sorgfältig die
Sicherheitshinweise.
Mit diesem Trimmer von BaByliss können unerwünschte bzw.
unschöne Haare an Augenbrauen, Nase und Ohren schnell und
sicher entfernt werden.
MERKMALE
• Abnehmbarer, kugelförmiger Spezial-Scherkopf für Nase und
Ohren
• Abnehmbarer Spezial-Präzisionsscherkopf für Augenbrauen
• Schnittführung zum Trimmen der Augenbrauen in 2 verschiedenen
Höhen: 3 und 5 mm.
BETRIEB DES SCHERGERÄTS
1. Um eine Batterie einzulegen, schrauben Sie den unteren Teil des
Gerätes ab (Abb. 1).
2. Legen Sie eine alkalische AA-Batterie mit der positiven Seite nach
unten ein. (Wenn das Gerät über einen längeren Zeitraum nicht
verwendet wird oder die Batterie leer ist, nehmen Sie sie aus dem
Gerät heraus, um dessen Lebensdauer zu verlängern.)
3. Nach dem Einsetzen der Batterie den Pfeil auf die Kerbe am Deckel
des Batteriefachs ausrichten und dann nach rechts drehen, so dass
er auf den Kreis zeigt (Abb.2)
4. Den Batteriedeckel nach rechts drehen, um das Gerät
einzuschalten; das Gerät beginnt zu laufen, wenn die Markierung
« I « auf die Kerbe an der Batterieabdeckung zeigt. (Abb.2)
5. Nach der Verwendung das Gerät ausschalten, indem Sie die Kerbe
an der Batterieabdeckung auf den Kreis drehen. (Abb.2)
Einsetzen und Abnehmen der Schneideköpfe
Überprüfen Sie, ob das Gerät ausgeschaltet ist.
- Entfernen Sie den Scherkopf vom Gerät, indem Sie ihn drehen, bis
die Markierung (I) mit der Markierung
IMPORTANT SAFETY
INSTRUCTIONS
READ ALL INSTRUCTIONS
BEFORE USING
FOR HOUSEHOLD
USE ONLY
KEEP AWAY FROM WATER
WARNING
1. Use close supervision when the appliance is
used by, on, or near children or individuals with
certain disabilities.
2. Use appliance only for its intended use as
described in this manual. Use only attachments
recommended by the manufacturer.
3. Never operate the appliance if it is not work-
ing properly, or has been dropped or damaged.
If appliance has fallen into water, do not
reach for it. Drain the water, let the unit dry, be
sure unit is off and then replace the battery.
4. Do not use the appliance with teeth missing
from the blades, as injury may result. Before
each use, make certain the blades are aligned
properly and oiled.
SAVE THESE
INSTRUCTIONS
TROUBLESHOOTING
There are several things to look for if your
trimmer fails to operate:
1. Be sure the trimmer is turned on.
2. Make sure that the battery is properly placed
in the battery compartment. Test the battery to
be sure it is working.
3. Check the blades to see if they are clogged
with hair clippings; if so, use a cleaning brush
to remove hair.
OPERATING
INSTRUCTIONS
1. To insert battery, remove compartment cover
by turning bottom piece of trimmer to the left,
then pulling straight down (Fig. 1).
2. Insert a AA battery, positive terminal
downward. (If you are not going to use the
device for long periods of time or if the battery
is dead, remove the battery from the device.
This will increase the battery's life.)
3. After inserting the battery, align the arrow
with the notch on battery cover and turn to the
right to align with the circle (Fig. 2).
*Do not use in the shower. To clean, simply
rinse trimmer blade under faucet.
4. Always purchase the correct size and grade
of battery most suitable for the intended use.
5. Clean the battery contacts and also those of
the device prior to battery installation.
6. Ensure the battery is installed correctly with
regard to polarity (+ and -).
7. Store unused batteries in their original
packaging, away from metal objects that could
short-circuit them. Never short-circuit batteries.
8. Never dispose of battery in fire, except under
conditions of controlled incineration. Failure
to observe this precaution may result in an
explosion. Never attempt to recharge primary
battery, as this may cause leakage, fire,
or explosion.
9. This appliance is not a toy. Keep away
from children.
GETTING STARTED
NOSE/EAR HAIR TRIMMER
Using the special circular cutting head for nose
and ears, gently insert the cutting head into the
nostril or ear and move it slightly back and forth
to cut the hair.
NOTE: To trim nose hair, insert trimmer at entry
of nostrils and start trimming the lower hairs
until no longer visible.
To trim ear hair, guide the trimmer around the
outer surface of the ear.
TO SWITCH TRIMMER HEADS
Check that the device is turned off.
• Remove the trimming head of the device by
turning it to line-up mark (
) with mark ( ).
Next, pull the head of the device upward (Fig. 3).
• Gently place the desired cutting head on the
device, then lock by turning the cutting head so
that the two marks line up (
and ) (Fig. 4).
DETAIL TRIMMER AND ATTACHMENTS
Use detail trimmer for sideburns, beard and
mustache, eyebrows, and all detail trimming:
Mustache
Attach detail trimmer and hold trimmer in an
upright position. Bring the tip of the blade
straight into the mustache to trim.
Neckline & Sideburns Attach detail trimmer
and hold the trimmer blade against the skin
at the length desired and move the trimmer
downward.
Comb Attachments
Attach comb to detail trimmer
(Fig. 5) and hold trimmer in
an upright position. Bring
the tip of the blade straight
into the mustache to trim.
2 combs (3 mm, 5 mm) are
included for a variety of
cutting lengths.
TAKING CARE OF YOUR TRIMMER
BLADE CARE
1. Brush away any loose hair that collects in
the blades.
2. Store trimmer in a safe location.
CLEANING TRIMMER
1. Make sure trimmer is OFF. To remove the
trimmer head for cleaning, turn the head
counterclockwise until the “I” mark aligns with
the arrow mark, then lift the head gently.
2. Rinse the head only under water. For proper
functioning of the unit, the handle cannot touch
or be immersed in water (Fig. 6).
3. After cleaning, make sure to shake the head
dry before reattaching it to the body.
4. To reattach the head onto the body, align the
“I” mark on the head with the arrow mark on
the body and then turn clockwise until the “I”
aligns with the circle mark on the body.
Fig.6
Fig. 3
Fig. 1 Fig. 2
Fig. 4
Fig. 5
bsnt1_19pl062448_ib_final 7-9-19.indd 1 7/9/2019 9:50 AM
übereinstimmt. Ziehen
Sie anschließend den Scherkopf nach oben vom Gerät ab (Abb. 3).
- Setzen Sie den gewünschten Scherkopf vorsichtig auf das Gerät auf
und befestigen Sie ihn, indem Sie den Scherkopf drehen, bis die
beiden Markierungen (I & 0) übereinstimmen (Abb. 4).
Verwendung des Spezial-Scherkopfes für Nase und Ohren
Führen Sie den kugelförmigen Scherkopf vorsichtig in die Nase bzw.
die Ohrmuschel ein und bewegen Sie ihn leicht hin und her.
Verwendung des Spezial-Präzisionsscherkopfes für
Augenbrauen
Einsetzen der Schnittführung
Bevor Sie die Schnittführung auf den Präzisionsscherkopf für
Augenbrauen aufsetzen, vergewissern Sie sich, dass das Gerät
ausgeschaltet ist.
- Für eine Schnitthöhe von 3 mm klicken Sie auf den Trimmerkopf.
- Für eine Schnitthöhe von 5 mm klicken Sie auf den Trimmerkopf.
Kammaufsätze
Befestigen Sie den Kamm am Detailtrimmer (Abb.5) und halten Sie
den Trimmer in aufrechter Position. Halten Sie die Spitze der Klinge
zum Trimmen gerade in die Augenbrauen.
2 Kammaufsätze (3 mm, 5 mm) für eine Vielzahl von Schnittlängen
liegen bei.
Gebrauchshinweise
Beginnen Sie zum Ausdünnen der Brauen am Innenrand der
Braue und dünnen Sie sie durch regelmäßige Bewegungen nach
außen aus. Beginnen Sie mit 5 mm Schnitthöhe, um sich mit dem
Gerät vertraut zu machen. Schneiden / rasieren Sie immer in
Wuchsrichtung. Drücken Sie dabei nicht auf die Klinge, da dies die
Klinge beschädigen oder zu einer Verletzung führen könnte. Straen
Sie die Haut mit der freien Hand für ein möglichst nahes Rasieren.
PFLEGE
1. Vergewissern Sie sich, dass der Trimmer auf OFF steht. Zum
Entfernen des Trimmerkopfs zu Reinigungszwecken diesen
entgegen dem Uhrzeigersinn drehen, bis die Markierung ‘I’ auf dem
Pfeil steht, und dann den Kopf vorsichtig abheben.
2. Ausschließlich den Kopf mit Wasser abspülen. Um die
Funktionsfähigkeit des Geräts zu erhalten darf der Gri nicht in
Berührung mit Wasser geraten oder untergetaucht werden (Abb.6)
3. Achten Sie nach der Reinigung darauf, dass Sie den Kopf trocken
schütteln, bevor Sie ihn wieder am Geräterumpf befestigen.
4. Um den Kopf wieder auf dem Geräterumpf zu befestigen die
Markierung ‘I’ über die Pfeil-Markierung auf dem Rumpf bringen
und dann im Uhrzeigersinn drehen, bis die Markierung ‘I’ auf die
Kreismarkierung auf dem Geräterumpf zeigt.
Allerdings darf der Gri des Geräts nicht mit Wasser in Berührung
kommen. Verwenden Sie das Gerät deshalb nicht unter der Dusche
oder in der Badewanne.
E110E - T167a
Fig. 1 Fig. 2
Fig. 3
Fig. 4
Fig. 5
Fig. 6
IB-19/297


Keskustele tuotteesta
Täällä voit jakaa mielipiteesi BaByliss E110E Nenäkarvatrimmeri:sta. Jos sinulla on kysyttävää, lue ensin huolellisesti käyttöohje. Käsikirjaa voi pyytää yhteydenottolomakkeellamme.