Before first use:
1.Clean all the parts according to “CLEANING AND MAINTENANCE”.
2.Set the bread maker on bake mode and bake empty for about 10 minutes. Or put 200ML water into the bread pan to bake for 10
minutes. This action in order to subside the smell of the heating element and bread pan. Beep will be heard after complete.
3. Unplug then let it cool down and clean all the detached parts again.Make sure the appliance has sufficient ventilation.
USAGE:
1 Open the cover (A5) and take the form of (A6) by lifting the handle.
2 Attach the mixer (A7).
3 Measure the ingredients you need and put all the forms.:
FIRST:Liquid ingredients
SECOND:Dry ingredients
LAST:Yeast (For best results use Bread machine yeast(preferred),active-dry yeast, and instant yeast.)
When adding flour, try to let it cover the water. Make a small indentation on the top of flour with finger, add yeast into the indentation
Make sure that yeast does not come into contact with salt or liquids.
NOTE: If making the high protein content wheat flour dough, it's recommended change the adding order:
First add yeast and wheat flour then sugar and salt, finally water or other liquids.
4 The form insert back into the slot (A1) and close the cover (A5).
5 Connect the device to the mains.
6 Select the baking program by pressing the MENU button (B1).
7 Select the size of bread LOAF SIZE button (B2).
8 Select the degree of browning of bread crust COLOR button (B5).
9 If you want to delay the execution of bread, set the time by pressing the TIME (B3).
10 Press the START button (B4) to the device.
11 When you start the machine will perform additional steps to inform us also at which point you can pour additional ingredients such as
nuts or fruit.
ATTENTION. It is possible that during baking steam will come out of the device. This is normal. Please do not be alarmed.
12 When the machine has finished, the display shows 0:00 and you will hear a beep.
13 After completion of the work function is activated to keep warm. It takes 60 minutes, the time will end 10 of beeps.
14 To remove the baking, press STOP (B4).
WARNING: When removing the form, use oven gloves.
15 The bread should cool for 15 minutes in the form, and then turning upside down over a tray, remove it.
The best results are achieved by placing the bread in half an hour on a grid to let it let off excess moistiure.
17 When you are finished, always disconnect the unit from the power supply.
TIME PROGRAMMER: The maximum delay for your bread is 15 hours.
NOTE: Do not use the delayed start if you use perishable products like eggs, milk, etc.
1 set the delayed start use the TIME.
2 To accept, press the START / STOP button. To change the program hold START / STOP button for 2 sec.
CLEANING AND MAINTENANCE:
1 Before cleaning, wait for the unit to cool down and disconnect the power.
2 The outer and inner surface wipe with a slightly damp cloth.
3.Wash the Form with hot water, without using detergent. Avoid scratching the surface the pot. Before the next use rinse thoroughly.
DO NOT SUBMERGE THE MECHANICAL PARTS IN WATER OR ANY SOLVENT. ONLY INSIDE OF THE FORM CAN BE CLEANED
WITH WATER
4 No parts of the device should be washed in the dishwasher.
5. If the kneading blade is difficult to remove from the bread pan, add some warm water to dip for 30mins. then can put out easily. Use
wet rag to clean it.
6. To clean top lid: After use, allow unit to cool. Use a damp cloth to wipe lid, and interior of viewing window. Do not use any abrasive
cleaners for cleaning, since this will degrade the high polish of the surface.
Note: It is suggested not disassembling the lid for cleaning.
7.Gently wipe the outer surface of housing with a wet cloth then use dry cloth to wipe. Never use petrol or other liquids. Never immerse
the housing into water for cleaning.
6. Before the bread maker is packed for storage, ensure that it has completely cooled down, is clean and dry, and the lid is closed.
BAKING PROGRAMS:
Program 1: Basic For white and mixed breads, it mainly consist of wheat flour or rye flour. The bread has a compact consistency. You
can adjust the bread brown by setting the COLOR button.
Program 2: French For light breads made from fine flour. Normally the bread is fluffy and has a crispy crust. This is not suitable for
baking recipes requiring butter, margarine or milk.
Program 3: Whole Wheat For breads with heavy varieties of flour that require a longer phase of kneading and rising (for example, whole
wheat flour and rye flour). The bread will be more compact and heavy.
Program 4: Sweet For breads with additives such as fruit juices, grated coconut, raisins, dry fruits, chocolate or added sugar. Due to a
longer phase of rising the bread will be light and airy.
Program 5: Butter milk Bread Kneading, rise and baking loaf with butter and milk to make bread.
Program 6: Gluten free Kneading, rise and baking GLUTEN free loaf. Normally for: gluten free flour, rice flour, sweet potato flour, corn
flour and oat flour.
Program 7: Super rapid Kneading, rise and baking loaf within the time less than basic bread. But the bread baked on this setting is
usually smaller with a dense texture.
Program 8: Cake Kneading, rise and baking, but rise with soda or baking powder.
Program 9. knead Setting the kneading time by user with different qty.
Program 10: Dough Kneading and rise, but without baking. Remove the dough and use for making bread rolls, pizza, steamed bread,
etc.
Program 11: Pasta dough To make the flour and water or some others can well commix.
Program 12: Yogurt Ferment and make the yogurt.
Program 13: Jam Boiling jams and marmalade.
Program 14: Bake For additional baking of breads that are too light or not baked through. In this program there is no kneading or
raising.
Program 15: Homemade
Press the HOMEMADE button to use this setting.
You can customized how many minutes in each phase for kneading, rise, baking, keep warm...every step.
4


Keskustele tuotteesta
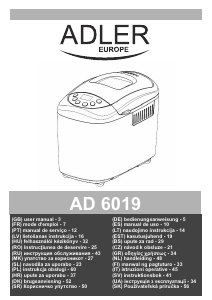
Täällä voit jakaa mielipiteesi Adler AD 6019 Leipäkone:sta. Jos sinulla on kysyttävää, lue ensin huolellisesti käyttöohje. Käsikirjaa voi pyytää yhteydenottolomakkeellamme.
vastaa | Tästä oli apual (74) (Googlen kääntämä)
vastaa | Tästä oli apual (28) Lue lisää (Googlen kääntämä)
Tästä oli apual (0) (Googlen kääntämä)
vastaa | Tästä oli apual (22) Lue lisää (Googlen kääntämä)
Tästä oli apual (16) (Googlen kääntämä)
Tästä oli apual (4) (Googlen kääntämä)
Tästä oli apual (0) (Googlen kääntämä)
vastaa | Tästä oli apual (13) Lue lisää (Googlen kääntämä)
Tästä oli apual (13) (Googlen kääntämä)
vastaa | Tästä oli apual (4) (Googlen kääntämä)
Loading…
vastaa | Tästä oli apual (3) (Googlen kääntämä)
vastaa | Tästä oli apual (1) (Googlen kääntämä)