Käyttöohje Adler AD 1176 Sääasema

Tarvitsetko käyttöoppaan Adler AD 1176 Sääasema? Alta voit katsoa ja ladata suomenkielisen PDF-oppaan ilmaiseksi. Tällä tuotteella on tällä hetkellä 5 usein kysyttyä kysymystä, 2 kommenttia ja sillä on 1 ääni ja tuotteen keskimääräinen luokitus on 100/100. Jos tämä ei ole haluamasi käyttöopas, ota meihin yhteyttä.

Onko tuotteessa vika, eikä käyttöoppaasta ole apua? Siirry Repair Café ‑alueelle etsimään ilmaisia korjauspalveluita.

Käyttöohje

Loading…

4
batteries inside.
Description of the device. ( Weather Station)
1. Control panel: Buttons 1.a. MODE, 1b.UP, 1.c. DOWN, 1.d. ALARM, ,1E. Max/Min 1G. SNOOZE/LIGHT
Display:
1. Clock 2.Inside temperature 3. Outside temperature 4. Probe 5. Weather Forecast 6. Alert Indicator
2. Operation Instruction
Insert the battery (2xAA) into the device or connect adapter after a few seconds, LCD will light up, after a beep, it enters default mode.
Into the probe insert 2x AAA battery.
2.1 Time Setting
Under default state, press and hold "MODE"(1a) for 4 seconds to enter setting in sequence, the time will start to flash.
Setting item blinking at 1s frequency.
Press “UP”(1b) key, the data goes up one step; press and hold for 2 seconds or more, it will go ahead at 8 steps per second speed.
Press the “DOWN”(1c) key, the value goes down one step; press and hold for 2 seconds, go back at 8 steps per second speed.
After setting, press "MODE"(1a) to confirm/exit.
After 10 seconds of not pressing any button, the device will exit the change mode and will save all current settings that were changed to that point.
The order of the setup goes as follows:
Hour FORMAT 24/12h → Hour → Minute→ Year→ Month→ Day→ Temperature format C/F→ Exit
2.2 Alarm Setting
To turn on alarm press the “ALARM”(1d) button once. The alarm icon will appear above the time and the last alarm setting will appear.
Press and hold “ALARM”(1d) Button for 2 seconds and the first digit of the setting will start to Flash.
Setting item blinking at 1s frequency.
Press “UP”(1b) key, the value goes ahead one step; press and hold for 2 seconds, go ahead at an 8 step per second speed.
Press “DOWN”(1c) once and back; press and hold for 2 seconds, go back at an 8 step per second speed.
After setting, press “ALARM”(1d) to confirm and exit.
After 10 seconds of not pressing any button, the device will exit the change mode and will save all current settings that were changed to that point.
AL2 Setting is the same as the AL1 setting.
Setting in sequence: Alarm Hour→Alarm Minute →Exit
2.3 Alarm ON/OFF
When the alarm turns on you can press. “ALARM”(1d) button to shut it off. You can also press the “Snooze”(1f) button. It will turn off again after the
*Snooze* time runs out after 5 minutes.
After 2 minutes of working the alarm will shut down of its own accord.
To change the backlight strength press “SNOOZE/LIGHT”(1f) once. The device has 2 settings. 1. Maximum backlight 2. Minimum backlight.
You can turn on the snooze function without limit.
* Snooze could be repeated all the time.
The alarm has 3 settings.
a.0-10 seconds after the alarm starts, the device will make a noise 1 time per second
b.10-20 seconds after the alarm starts, the device will make a noise 2 time per second
c. Over 20 seconds after the alarm starts, the device will make a noise 4 time per second
2.5 Temperature and Humidity Function
* Out of the indoor and outdoor temperature display, the low-end displays “Lo”, the high-end displays “Hi”. You can check the lowest and highest recorded
temperatures by pressing the „Max/Min” briefly to cycle between them.
* Indoor temperature upper limit: 50C, lowest limit: 0C.
* Outdoor temperature upper limit: 70C, lowest limit: -40C.
2.4 Date check
To check the Date. In default mode, press the „Mode”(1a) button once.
2.5 Alarm time check.
To check the Alarm setting. In default mode, press the „Mode”(1a) button twice.
TECHNICAL DATA
Supply voltage - Station: AC 100-240 V 50 / 60Hz plus 3 1.5V AAA batteries
Supply voltage - Probe: 2 1.5V AAA batteries. Frequency: 433.99 MHz
Adler Sp. z o.o. Ordona 2a, 01-237 Warsaw, Poland hereby declares that the AD1176 device complies with the Directive
2014/53 / EU. The full text of the EU declaration of conformity is available at the following internet address:
https://adler.com.pl/dane/CE/ADLER/AD1176.pdf
4
Lataa käyttöohje suomalainen (PDF, 2.25 MB)
(Mieti ympäristöä ja tulosta tämä käyttöopas vain, jos se on todella tarpeen)

Loading…

Arviointi

Kerro meille mielipiteesi Adler AD 1176 Sääasema arvioimalla tuote. Haluatko jakaa tuotekokemuksesi tai kysyä kysymyksen? Jätä kommentti sivun alalaidassa.
Oletko tyytyväinen kohteeseen Adler AD 1176 Sääasema?
Kyllä Ei
100%
0%
1 ääni

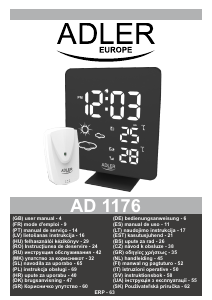
Keskustele tuotteesta

Täällä voit jakaa mielipiteesi Adler AD 1176 Sääasema:sta. Jos sinulla on kysyttävää, lue ensin huolellisesti käyttöohje. Käsikirjaa voi pyytää yhteydenottolomakkeellamme.

Gael Jourda 04-11-2022
Ulkolämpötilaa ei enää näytetä edes paristoja vaihdettaessa, kuinka se tehdään

vastaa | Tästä oli apual (2) (Googlen kääntämä)
Bartek 15-09-2022
Pitäisikö laitteen näytön olla valaistu koko ajan? Asemallani näyttö katoaa ja kun siirrän asemaa, tiedot näytetään

vastaa | Tästä oli apual (0) (Googlen kääntämä)

Lisää tästä ohjekirjasta

Ymmärrämme, että on mukavaa, että sinulla on paperikäyttöinen käyttöopas laitteellesi Adler AD 1176 Sääasema. Voit aina ladata oppaan verkkosivuiltamme ja tulostaa sen itse. Jos haluat alkuperäisen käyttöoppaan, suosittelemme ottamaan yhteyttä osoitteeseen Adler. He saattavat pystyä toimittamaan alkuperäisen ohjekirjan. Etsitkö laitteen Adler AD 1176 Sääasema käyttöopasta toisella kielellä? Valitse haluamasi kieli kotisivuiltamme ja etsi mallinumero nähdäksesi, onko sitä saatavilla.

Tekniset tiedot

Tuotemerkki Adler
Malli AD 1176
Kategoria Sääasemat
Tiedostotyyppi PDF
Tiedoston koko 2.25 MB

Kaikki käsikirjat kohteelle Adler Sääasemat
Lisää Sääasemat käsikirjoja

Usein kysytyt kysymykset kohteesta Adler AD 1176 Sääasema

Tukitiimimme etsii hyödyllisiä tuotetietoja ja vastaa yleisiin kysymyksiin. Jos huomaat yleisissä kysymyksissä virheen, kerro siitä meille yhteydenottolomakkeella.

Sääasemani ennusti, että alkaisi sataa, mutta niin ei käynyt. Mistä se johtuu? Todennettu

Sääaseman ennustus perustuu ilmanpaineeseen. Yleensä matalapaine merkitsee huonoa säätä ja korkeapaine hyvää säätä. On mahdollista, että sääolot kehittyivät eri tavalla kuin ilmanpaine ennusti.

Tästä oli apual (1405) Lue lisää

Mikä on paras sääaseman ja sen antureiden sijainti? Todennettu

Itse sääasema on sijoitettu sisälle, ja se on pidettävä poissa lämmönlähteistä, kuten keittiöstä, ikkunoista tai sähkölaitteista. Erillinen ulkolämpötila-anturi on sijoitettava varjoon ja vähintään 1,25 m maanpinnan yläpuolelle. Sadetunnistin on sijoitettava avoimelle alueelle, jossa se voi aina kerätä sadetta. Tuulianturi on sijoitettava myös avoimelle alueelle, tuulen mahdollisten esteiden kanssa.

Tästä oli apual (334) Lue lisää

Laitteeni akku on hapetettu, voinko silti käyttää sitä turvallisesti? Todennettu

Ja, laitetta voidaan silti käyttää turvallisesti. Poista ensin oxidizd-paristo. Älä koskaan käytä tätä paljain käsin. Puhdista sitten paristolokero etikkaan tai sitruunamehuun kastetulla vanupuikolla. Anna sen kuivua ja aseta uudet paristot.

Tästä oli apual (236) Lue lisää

Sääasemallani on sademittari, voiko se mitata myös lumisateen määrän? Todennettu

Jotkut sademittarit on varustettu lämmityselementillä, joka saa lumen sulamaan ja mahdollistaa sen mittaamisen. Ilman lämmityselementtiä sademittari tukkeutuu eikä mittausta voida suorittaa.

Tästä oli apual (236) Lue lisää

Voinko jättää vaihdettavan akun laitteeseen pitkäksi aikaa? Todennettu

Vaihdettavat paristot voivat olla laitteessa pitkään, jos laitetta käytetään. Kun laitetta säilytetään pitkään, on suositeltavaa poistaa paristot hapettumisen estämiseksi.

Tästä oli apual (236) Lue lisää
Käyttöohje Adler AD 1176 Sääasema

Liittyvät tuotteet

Aiheeseen liittyvät luokat